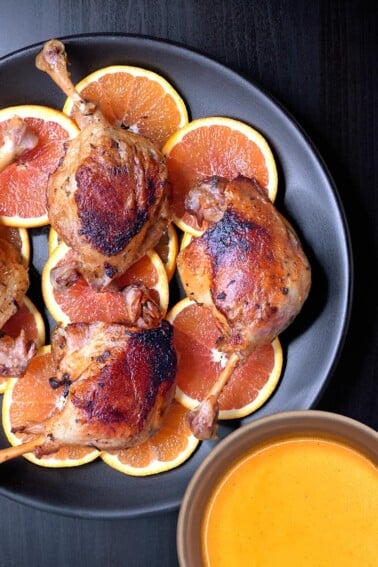
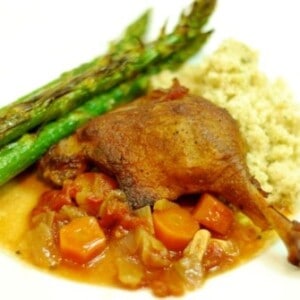
Want a great, make-ahead, easy-peasy duck leg recipe where the meat is meltingly tender yet the skin is crispy? Make this recipe and thank me later.
For this dish, I modified Molly Steven’s recipe for Duck Ragu with Pasta in her fantastic cookbook, All About Braising. In her version, she braises the duck in a tomato-wine sauce, shreds the meat, and tosses the meaty sauce with pasta. In my version, I braise the duck, store the dish in the fridge for a couple days, and then roast the whole legs in the oven so the skin crisps up on top. Super easy to prepare ahead AND delicious.
Time to make Crispy Braised Duck Legs!
Serves 4
Ingredients:
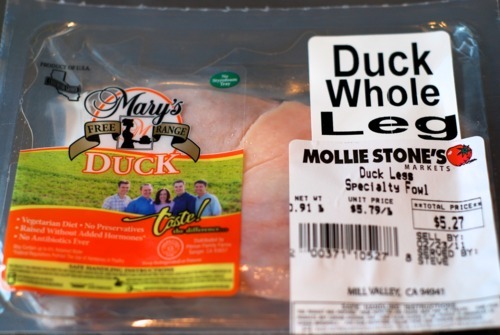
- 6 duck legs
- 1 (14.5 ounce) can organic diced tomatoes
- 1 tablespoon avocado oil
- 1 medium yellow onion, chopped into ½-inch dice
- 2 carrots, sliced in ½-inch rounds
- 1 celery stalk ,cut into ½-inch pieces
- 4 garlic cloves, thinly sliced
- 2 large thyme sprigs
- 2 bay leaves
- 2/3 cup dry vermouth or white wine
- ¾ cup chicken broth
- Kosher salt
- Freshly ground pepper
Equipment:
- All of my recommended kitchen tools are listed here.
Method:
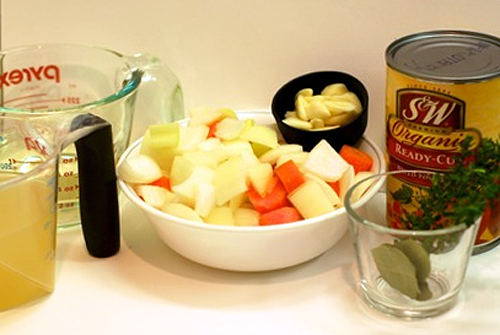
I assembled the ingredients…
…took out the duck legs from the fridge…
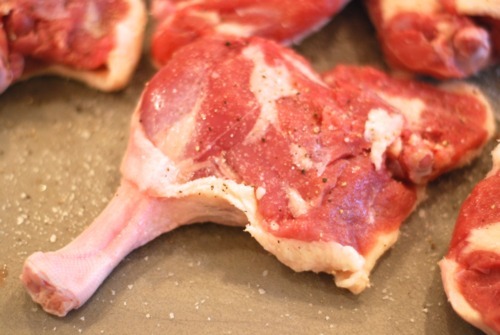
…and used my kitchen shears to trim the duck of as much fat as possible without cutting into the skin or the meat. I also cut off any loose flaps of skin but made sure the top of the leg was all covered with skin. Next, I seasoned the duck with salt and pepper on both sides.
I preheated the oven to 325 F.
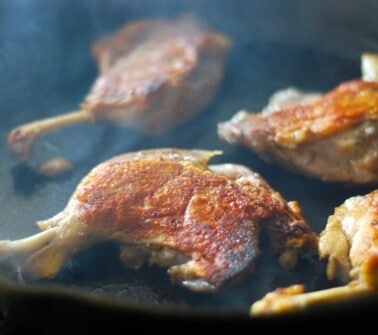
Then, I browned the legs in a single layer in a large dutch oven over medium-high heat. As soon as the pot was hot, I placed the legs skin side down on the ungreased surface and seared for 7 minutes. I flipped them over and fried for 3-4 more minutes or until nicely browned on both sides. I transferred the legs to another dish and repeated the process until all the legs were finished. 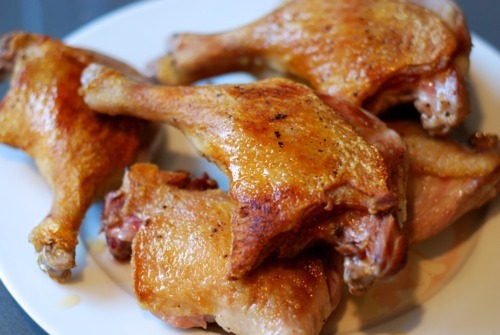
I poured out the drippings into a storage container that I stored in the fridge for other uses. Mmmm… duck fat!
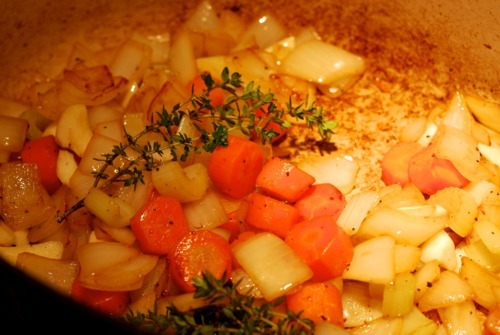
I added 1 tablespoon of avocado oil to the pan and tossed in the onions, carrots, celery, garlic, and thyme sprigs with some salt and pepper. I sauted the vegetables for 7-8 minutes or until they were softened. I turned down the heat to medium so the veggies wouldn’t burn.
I added white wine/vermouth and simmered the sauce for 6 minutes or until the liquid was reduced by half. Then I added the chicken broth and simmered that until it was reduced by half. My last step was to add the can of tomatoes (including the juices) and simmered everything for 2-3 minutes to meld the flavors.
Once the sauce was done, I placed the duck legs on top, skin-side up and tucked in the bay leaves. 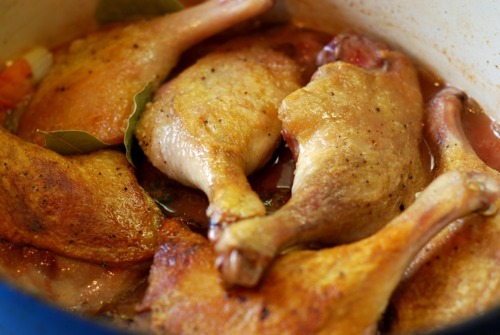
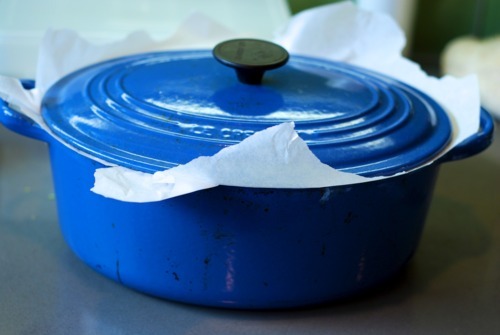
I added a piece of parchment paper and pressed it down until it almost touched the duck. I put on the cover and popped the pot in the oven for two hours.
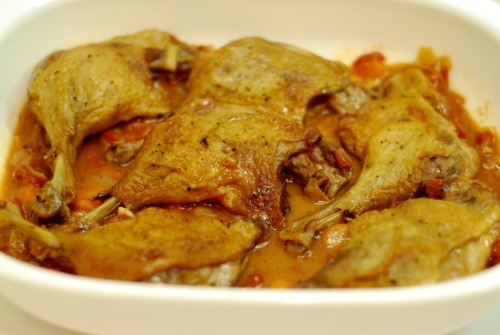
When the legs were finished braising, I transferred the dish to a storage/baking dish and put it in the fridge. I made sure the sauce was on the bottom and the duck legs were on top, skin-side up. You can store the braised duck in the fridge for a couple days.
When I was ready to serve the duck, I preheated my oven to 400 F on convection roast and I stuck the dish on the middle rack and let it bake for 25 minutes.
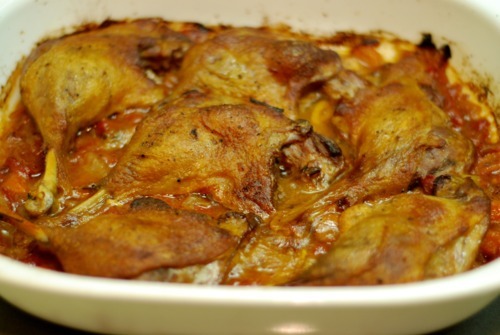
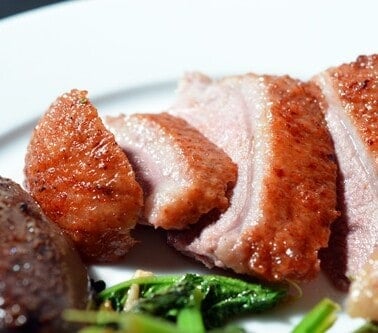
The skin gets nice and crispy and the meat is really tender and delicious. Yummy!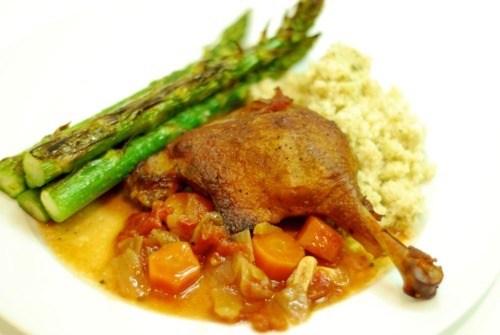
Looking for more recipe ideas? Head on over to my Recipe Index. You’ll also find exclusive recipes on my iPhone and iPad app, and in my cookbooks, Nom Nom Paleo: Food for Humans (Andrews McMeel Publishing 2013), Ready or Not! (Andrews McMeel Publishing 2017), and Nom Nom Paleo: Let’s Go! (Andrews McMeel Publishing 2021).
PRINTER-FRIENDLY RECIPE CARD
Crispy Braised Duck Leg
Ingredients
- 6 duck legs
- 1 tablespoon avocado oil
- 1 medium yellow onion chopped into ½-inch dice
- 2 carrots cut into ½-inch rounds
- 1 celery stalk cut into ½-inch pieces
- 4 garlic cloves thinly sliced
- 2 large thyme sprigs
- ⅔ cup dry vermouth or white wine
- ¾ cup chicken broth
- 1 (14.5 ounce) can organic diced tomatoes
- 2 bay leaves
- Diamond Crystal kosher salt
- Freshly ground black pepper
Instructions
- Assemble and prep your ingredients and take the duck legs out of the fridge.
- Use your kitchen shears to trim the duck of as much fat as possible without cutting into the skin or the meat. I also cut off any loose flaps of skin but made sure the top of the leg is all covered with skin.
- Next, season the duck with salt and pepper on both sides and I preheat the oven to 325°F.
- Brown the legs in a single layer in a large dutch oven over medium-high heat. As soon as the pot is hot, place the legs skin side down on the ungreased surface and seared for 7 minutes. Flip them over and fry for 3-4 more minutes or until nicely browned on both sides. Once you're done browning the legs, transfer the legs to another dish and repeat the process until all the legs were finished. (Tip: Pour out the drippings into a storage container and store in the fridge for other uses. Mmmm… duck fat!)
- Add 1 tablespoon of avocado oil to the dutch oven and toss in the onions, carrots, celery, garlic, and thyme sprigs with some salt and pepper. Sauté the vegetables for 7-8 minutes or until they are softened. Once softened, turn down the heat to medium so the veggies don't burn.
- Add the white wine/vermouth to the veggies and simmer the sauce for 6 minutes or until the liquid is reduced by half. Then add the chicken broth and simmer that until it is reduced by half. My last step is to add the can of tomatoes (including the juices) and simmer everything again for 2-3 minutes to meld the flavors.
- Once the sauce is done, place the duck legs on top, skin-side up and tuck in the bay leaves.
- Add a piece of parchment paper and pressed it down until it almost touches the duck. Put on the cover and pop the pot in the oven for two hours.
- When the legs are finished braising, transfer the dish to a storage/baking dish and put it in the fridge. I always make sure the sauce is on the bottom and the duck legs are on top, skin-side up. You can store the braised duck in the fridge for a couple days.
- When you're ready to serve the duck, preheat your oven to 400°F on convection roast and stick the dish on the middle rack and let it bake for 25 minutes. The skin will get nice and crispy and the meat is really tender and delicious. Yummy!
Nutrition
Nutrition information is automatically calculated, so should only be used as an approximation.