This simple Air Fryer Cracklin’ Chicken is the BEST way to cook crispy chicken thighs! With only 3 ingredients (boneless, skin-on chicken thighs, salt, and seasoning of choice) it’s fast, easy, and mess-free!

Table of Contents
- Why is this the best air fryer chicken thigh recipe?
- Tips for the best air fryer Cracklin’ Chicken
- Which air fryer should you buy?
- Ingredients
- How to make the crispiest air fryer chicken thighs
- Pro tip!
- How do you store and reheat them?
- Other Air Fryer Chicken recipes
- The Best Air Fryer Chicken Thighs: Cracklin’ Chicken! Recipe
Why is this the best air fryer chicken thigh recipe?
- Cracklin’ Chicken = Super crispy skin + juicy, well-seasoned chicken meat! Everyone will be clamoring for the last piece and it’s naturally gluten-free! Plus, my kids love that the chicken thighs are boneless but there’s still crusty skin!
- No flipping the bird required! You air fry boneless chicken thighs skin-side up until cooked through and there’s no need to flip or rotate them!
- Simply air fry for 400°F for 15 to 18 minutes and you’re done!
- You can customize the flavor by varying the seasoning on the meat-side! (Psst! All four of my Nom Nom Paleo Spice Blends taste great on Cracklin’ Chicken!)
- It goes well with any veggie side dish! I especially love it with my Chopped Salad with Sesame Ginger Dressing and Pineapple Coleslaw!
Tips for the best air fryer Cracklin’ Chicken
- Flatten the boneless chicken thighs evenly with a meat pounder to ensure even cooking.
- Only season the skin with salt so it will crisp up golden brown without burning! If you want to use a seasoning blend, only season the meat side.
- No need to add oil! I know many of you are tempted to brush the skin with olive oil or avocado oil, but the skin comes out crispier WITHOUT it.
- Lay the boneless chicken thighs in a single layer in the air fryer. The thighs can touch each other on the side, but there should be no overlap—we’re aiming for 100% crispy skin!
Which air fryer should you buy?
As with all of my kitchen purchases, I continue to do lots of research to find the best reviewed basket-style air fryer model. As of January 2026, my new favorite air fryer is the Cosori Iconic Stainless Steel Air Fryer! Not only is the interior lined with stainless steel or ceramic, it works really, really great as well. It’s the one I’m recommending until a better one comes along!

If the ceramic coating is still a dealbreaker for you, you can get a Breville Smart Oven Air which uses stainless steel baskets. That being said, this countertop oven is really hard to clean after you cook Cracklin’ Chicken in it. (No air fryer? Make the original Cracklin’ Chicken on the stovetop!)
Ingredients
- Chicken thighs, skin-on and bone-in: Chicken thighs are my favorite cut of the chicken because of the great flavor and low price. If you don’t want to debone them yourself (instructions are below), you can buy skin-on and boneless chicken thighs at many Japanese supermarkets (e.g., Mitsuwa, Nijiya, etc.). Please don’t substitute boneless skinless chicken thighs—the best part of this recipe is the golden skin!
- Diamond Crystal kosher salt: This is my favorite salt brand because the hollow, easily dissolvable flakes make it hard to over-salt your food. I only season the skin with kosher salt because adding a seasoning blend with other herbs or pepper can potentially burn—ruining the crispy skin!
- Magic Mushroom Powder or your favorite Nom Nom Paleo spice blend (optional): Cracklin’ Chicken will taste great if all you season the meat with is salt, but if you want to jazz things up, use your favorite Nom Nom Paleo seasoning blend! You can make them yourself (three out of the four recipes are in Nom Nom Paleo: Let’s Go!) or buy the blends on Amazon or from The Spice Lab. If you don’t want to use one of my seasoning blends, just mix up your own with salt, garlic powder, onion powder, and some smoked paprika!
How to make the crispiest air fryer chicken thighs
Debone the chicken thighs
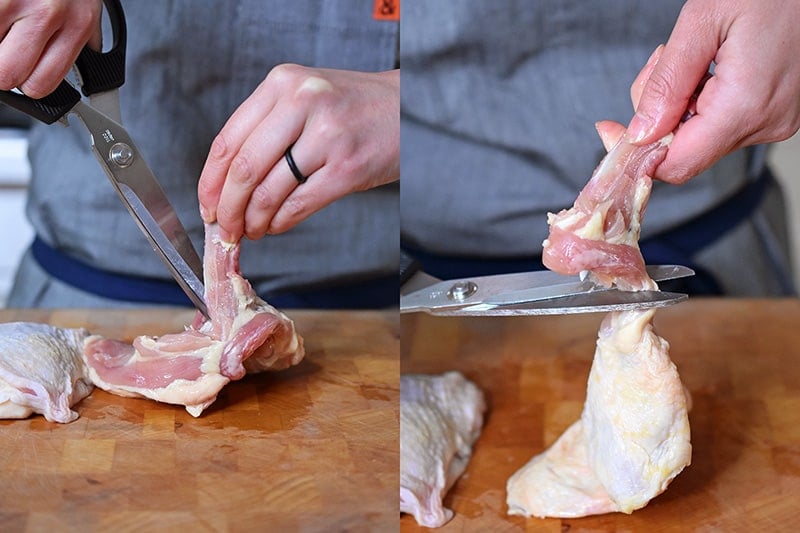
Wondering how to debone chicken thighs at home? Grab some chicken thighs and a sharp pair of kitchen shears. Pat the chicken dry with a paper towel to remove any extra moisture. If the thigh bone isn’t exposed, use the shears to snip through the meat to expose it. Then, starting at one end, carefully cut out the bone, making sure you don’t cut through the meat.

Trim as close to the bone as possible. When you get to the other end, trim around the joint and cartilage and remove the bone. Save these bones for homemade bone broth! Repeat with the remaining thighs.
Pro tip!
You can buy skin-on, bone-out chicken thighs at your neighborhood Japanese supermarket (e.g. Nijiya Market)! When I see them on sale, I grab a bunch so I freeze a stash in the freezer for the future!
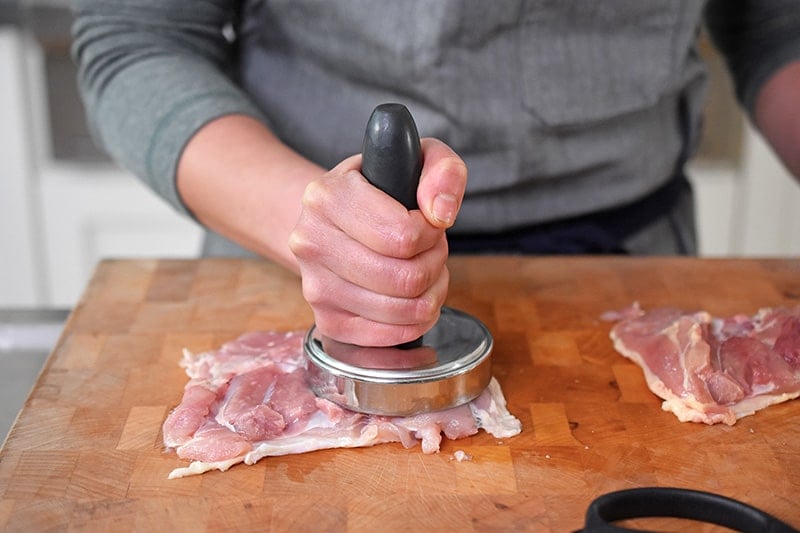
Pound the chicken thighs
Flatten the chicken evenly with a meat pounder to ensure uniform cooking.
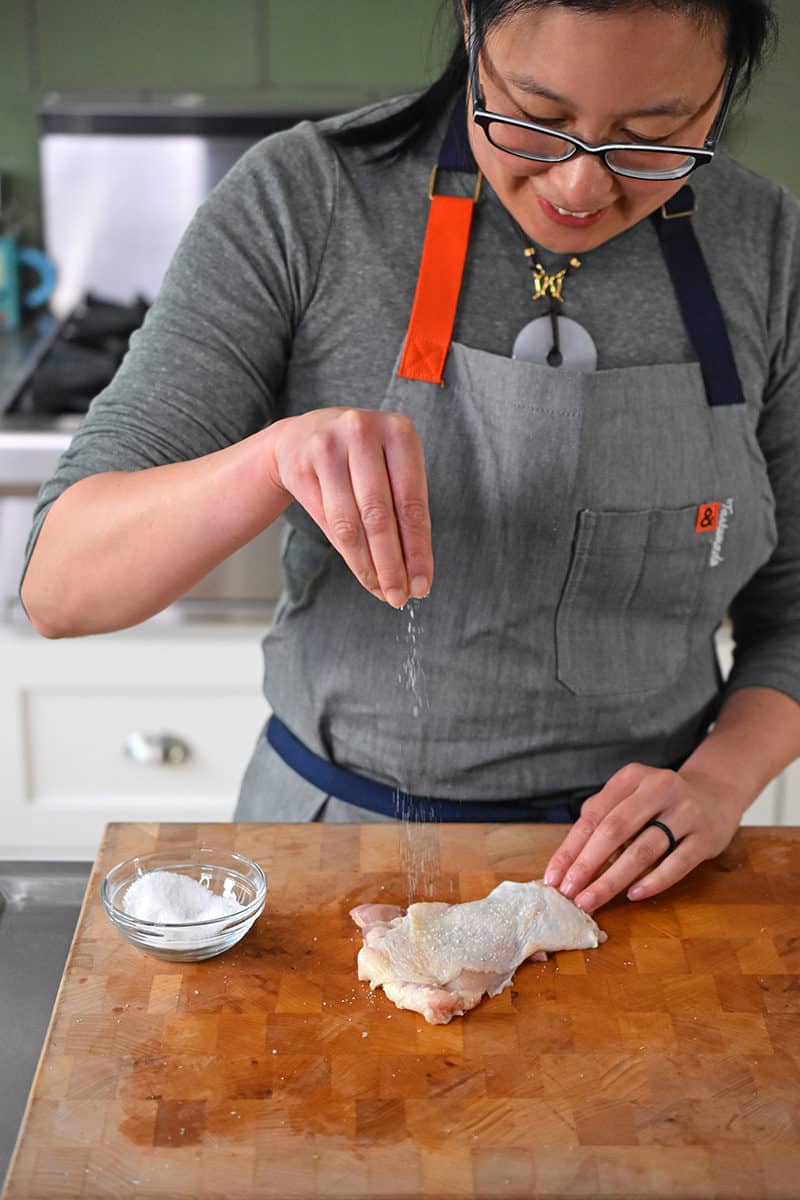
Season the chicken thighs
Sprinkle Diamond Crystal kosher salt on both sides of the chicken thighs. If you want to spice things up, you can sprinkle your favorite seasoning salt (e.g. Magic Mushroom Powder) on the meat side—but avoid sprinkling anything but salt on the skin side. (I don’t recommend putting anything besides salt on the skin because the spices can burn.)
Air fry the chicken thighs
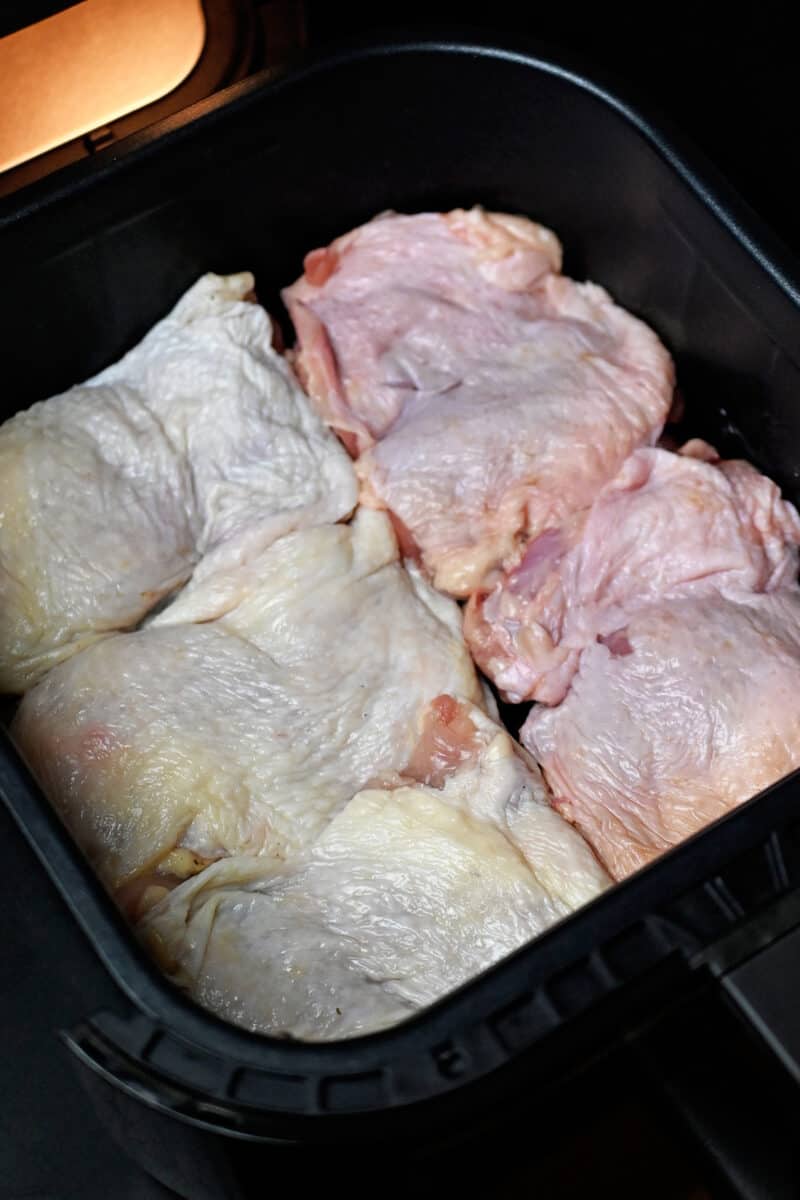
Preheat the air fryer to 400°F and set the cook time for 15 to 18 minutes, depending on the size of your chicken thighs. If your air fryer does not have a non-stick coating, spray avocado cooking spray before you place chicken thighs skin side up in the the air fryer basket.
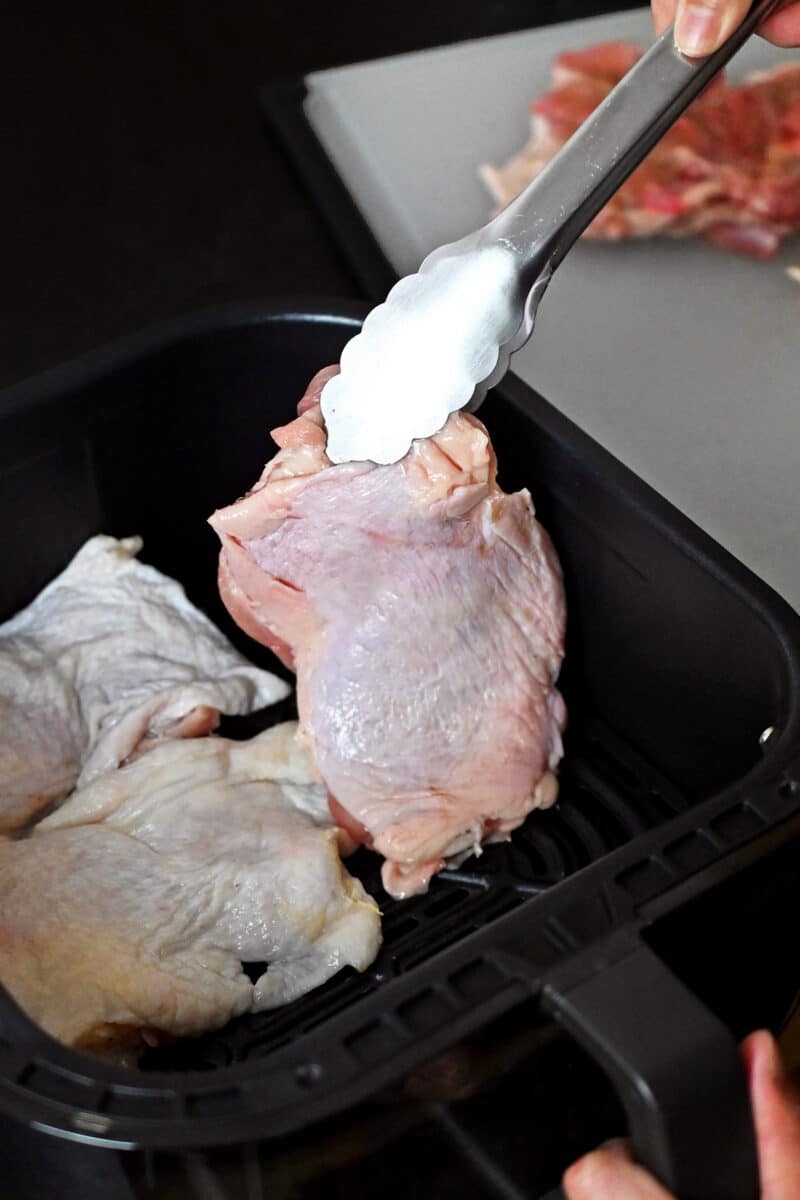
When the air fryer reaches 400°F, add the chicken thighs. You can actually smoosh up to five chicken thighs in a single layer in most 6-quart air fryer baskets without leaving any space in between them. They’ll turn out fine—the pieces will shrink as they cook.
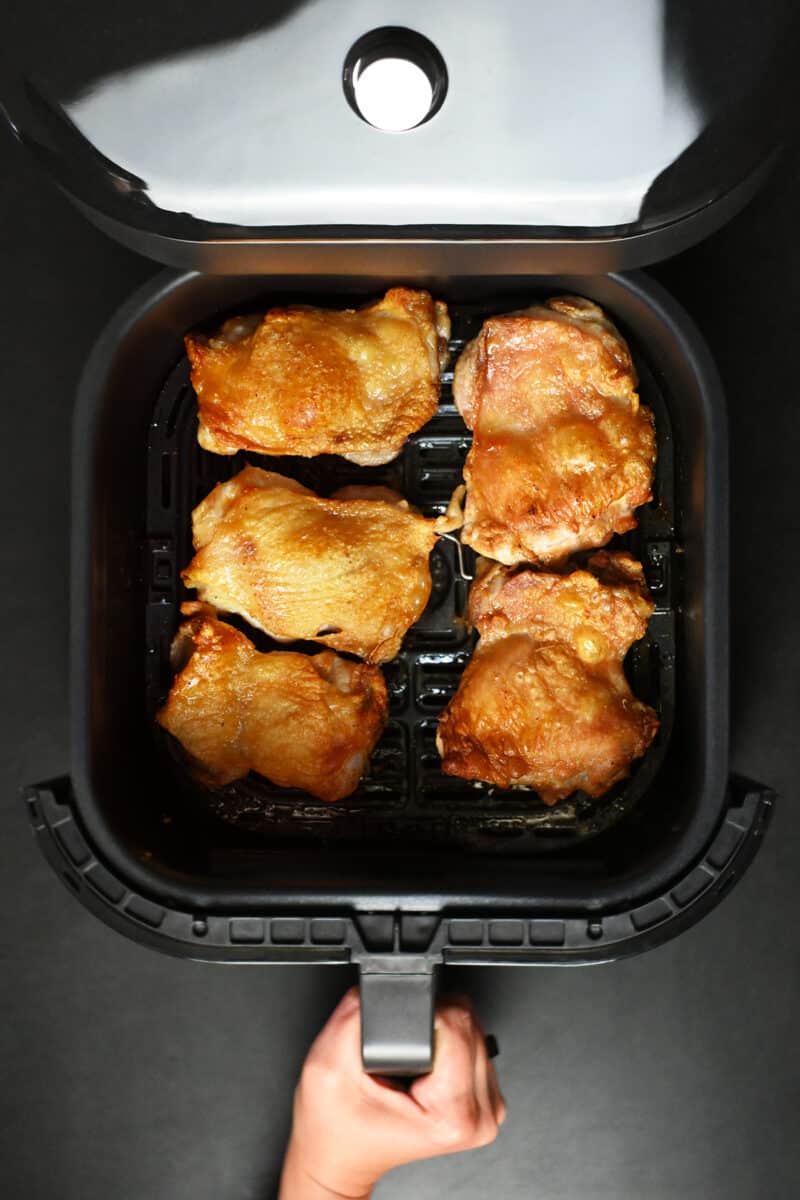
The Cracklin’ Chicken is ready when the skin is crispy and the meat is thoroughly cooked (at least 165°F internal temperature in the thickest part of the thigh when stabbed with a meat thermometer). If you’re making another batch, pour out the rendered fat before cooking another batch to reduce the amount of smoke.
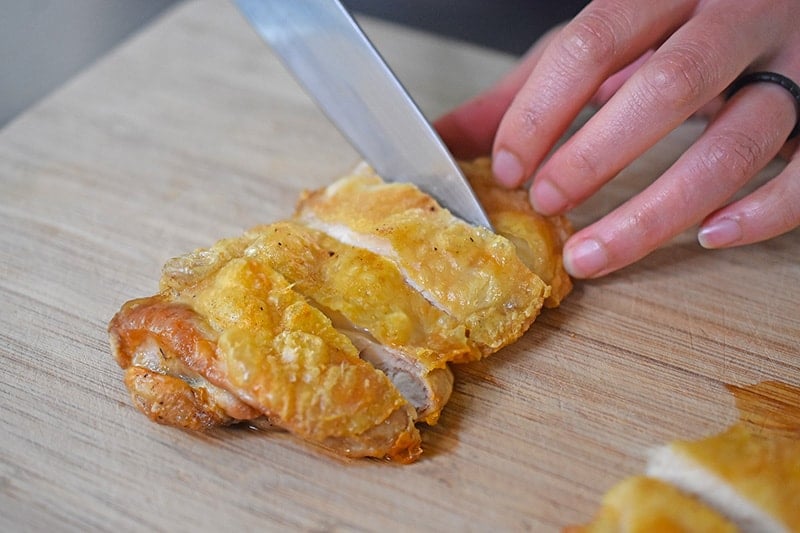
Serve!
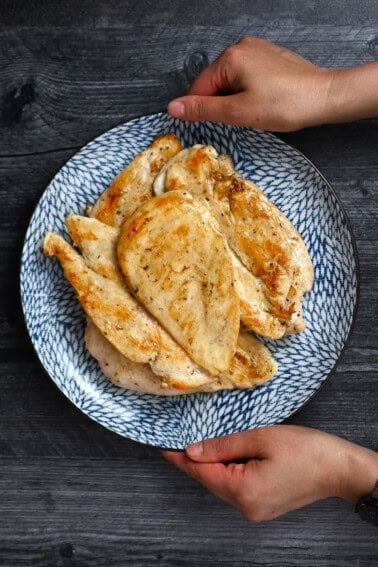
Slice up the Cracklin’ Chicken, transfer to a serving dish, and enjoy! If you need a sauce, you can make Sriracha Mayonnaise (simply whisk 4 parts of mayonnaise with 1 part of sriracha sauce in a small bowl), All-Purpose Stir-Fry Sauce, or Hoisin Sauce.
How do you store and reheat them?
You can store the chicken in a sealed airtight container in the refrigerator for up to four days. You can reheat leftovers in the air fryer, skin-side up, at 400°F for about 5 minutes or until the skin is crispy and the meat is heated through.
Other Air Fryer Chicken recipes
Looking for more recipe ideas? Head on over to my Recipe Index. You’ll also find exclusive recipes in my cookbooks, Nom Nom Paleo: Food for Humans (Andrews McMeel Publishing 2013), Ready or Not! (Andrews McMeel Publishing 2017), and Nom Nom Paleo: Let’s Go! (Andrews McMeel Publishing 2022).
PRINTER-FRIENDLY RECIPE CARD
The Best Air Fryer Chicken Thighs: Cracklin’ Chicken!
Ingredients
- 5 chicken thighs skin-on, and bone-in
- Diamond Crystal kosher salt or your favorite cooking salt
- Magic Mushroom Powder (optional)
Instructions
- Grab some chicken thighs and a sharp pair of kitchen shears. Blot the chicken dry with a paper towel. If the thigh bone isn’t exposed, use the shears to snip down to expose it. Then, starting at one end, carefully cut out the bone, making sure you don’t cut through the meat.
- Trim as close to the bone as possible. When you get to the other end, trim around the joint and cartilage and remove the bone. Save these bones for homemade bone broth! Repeat with the remaining thighs.
- Flatten the chicken with a meat pounder to ensure uniform cooking.
- Sprinkle Diamond Crystal kosher salt on both sides of the chicken thighs. If you want to spice things up, you can sprinkle your favorite seasoning salt (e.g. Magic Mushroom Powder) on the meat side—but avoid sprinkling anything but salt on the skin side. (I don’t recommend putting anything besides salt on the skin because the spices can burn.)
- Preheat the air fryer to 400°F for 15 to 18 minutes, depending on the size of the thighs.
- When the air fryer is hot, carefully arrange the chicken thighs in a single layer, skin side up, in the the air fryer basket. (If your air fryer does not have a non-stick coating, spray avocado cooking spray before you place the chicken thighs in a single layer, skin side up, in the the air fryer basket.) You can actually smoosh up to five chicken thighs in a single layer in most 6-quart air fryer baskets without leaving any space in between them. They’ll turn out fine—the pieces will shrink as they cook.
- The Cracklin’ Chicken is ready when the skin is crispy and the meat is thoroughly cooked (at least 165°F in the thickest part of the thigh using a meat thermometer). If you’re making another batch, pour out the rendered fat before cooking another batch to reduce the amount of smoke.
Video
Notes
- Flatten the deboned chicken thighs evenly with a meat pounder to ensure even cooking.
- Only season the skin with salt so it will crisp up golden brown without burning! If you want to use a seasoning blend, only season the meat side.
- No need to add oil! I know many of you are tempted to brush the skin with olive oil or avocado oil, but the skin comes out crispier WITHOUT it.
- Lay the chicken thighs in a single layer in the air fryer. The thighs can touch each other on the side, but there should be no overlap—we’re aiming for 100% crispy skin!
- Spice things up by seasoning the meat side with one of my amazing Nom Nom Paleo Spice blends! You can make them yourself (three out of the four recipes are in Nom Nom Paleo: Let’s Go!) or buy the blends on Amazon or from The Spice Lab.
Nutrition
Nutrition information is automatically calculated, so should only be used as an approximation.


These are so delicious. I tried it on the stove and yes it was a mess. Now that I have the fryer it is so easy! I love all dark chicken meat, Skin and all. My husband ALWAYS picks the skin off thighs and drumsticks. He didn’t with these. I told him the skin tastes like bacon cooked this way and he was sold.
This recipe is on regular rotation at my home. So much that it is now on my daughters and friends rotations too. Easy and YUMMY. Between this recipe and the Kalua Pork both are hands down family favorites.
Our entire family loves this!!! So easy to make, healthy but feels guilty it’s so delicious, quick. 5 stars. So easy.
This has been a favorite recipe for years in my house! My children used to take it for lunch when they were in middle/high school and now they’re out of college and we still eat this on a weekly basis. It used to be so messy to cook indoors, so we started cooking it outside on the grill. This air fryer version sounds even easier! 👍🏼 simple recipe, yet oh so good!
I was missing that fried chicken flavor and crunch. This is a fast quick and easy go to for those times when I want that. So delicious! I haven’t used the magic mushroom powder but I can only imagine it would add to the flavor.
By far, the easiest way to make chicken thighs. They always come out perfectly crispy and juicy!!!
Some great nuggets in the instructions. I never thought of taking the bone out!! 💡Or pounding it.💡 Thirdly keeping those bones for broth!!! 💡💡💡 Thanks for the many tips.
The mushroom magic link isn’t good for Canada but I’ll look for it. 😍🤩🥰
LOVE THIS! So easy and so good! I don’t mind removing the bones, but now I’m thinking twice about trying this leaving them in. I make these for quick weekday lunches with salad or snacks for my teenage boys on the weekend.
I’ve been making these for years on the stove from your original recipe, but just tried the air fryer version and it’s *chefs kiss!*
So much easier and less splatter and perfectly crispy.
For the uninitiated, deboning the thighs is really NBD once you get used to it.
Full disclosure though, I’m too lazy to pound them even, and they still turn out just great.
Followed recipe except didn’t pat dry or pound chicken. Just straight but salted and put in air fryer. Still delicious! I used the Peruvian green sauce from another one if your recipes.