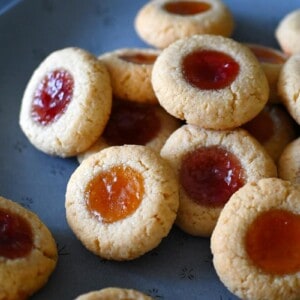
These paleo thumbprint cookies are the jam-filled treats from your childhood, remade to be gluten-free and grain-free! This simple and delicious recipe will be one of your favorite holiday traditions!
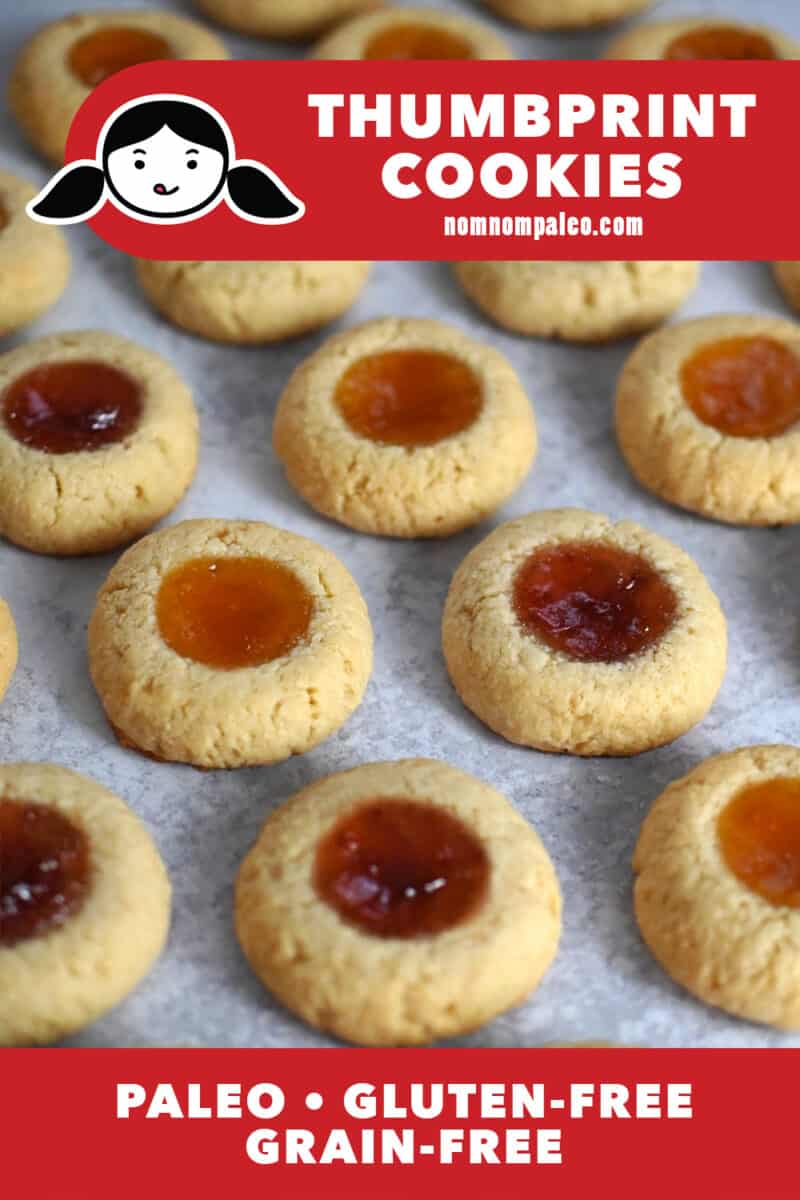
Table of Contents
- The perfect holiday cookie!
- Ingredients
- How to make thumbprint cookies
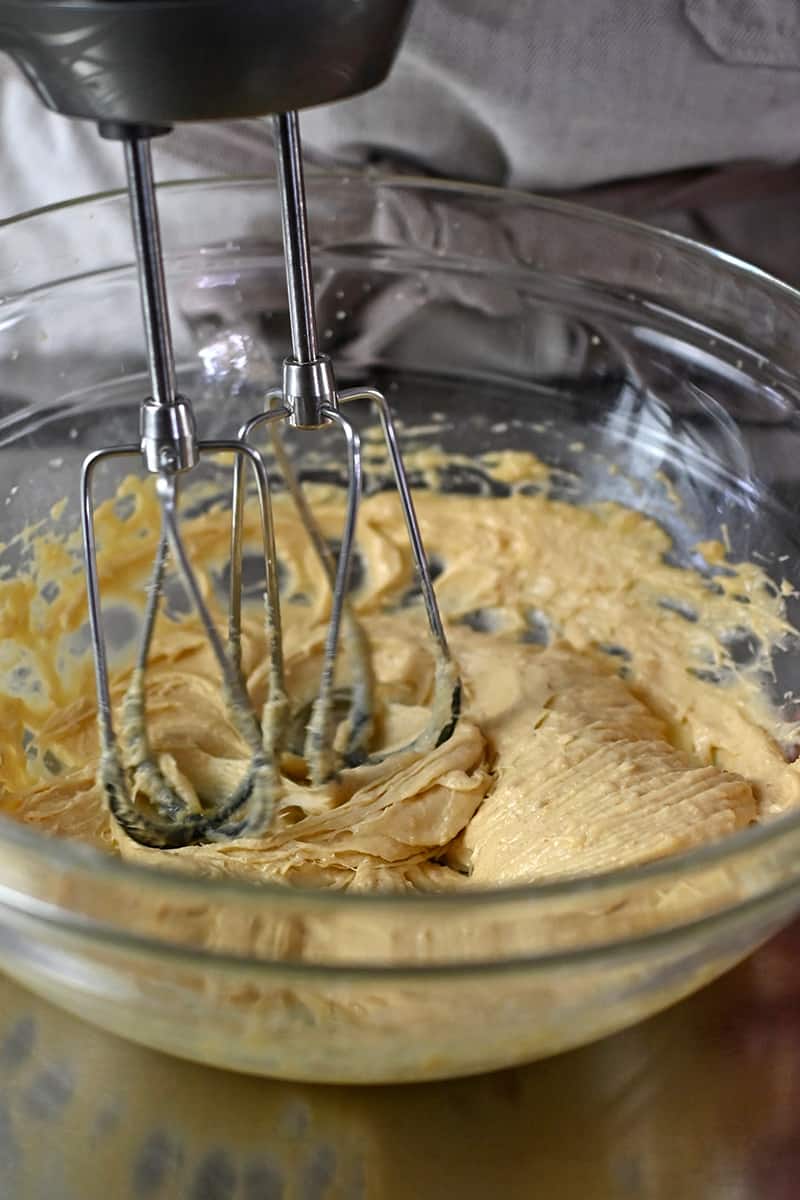
- Cream the sugar and fat
- Add the wet ingredients
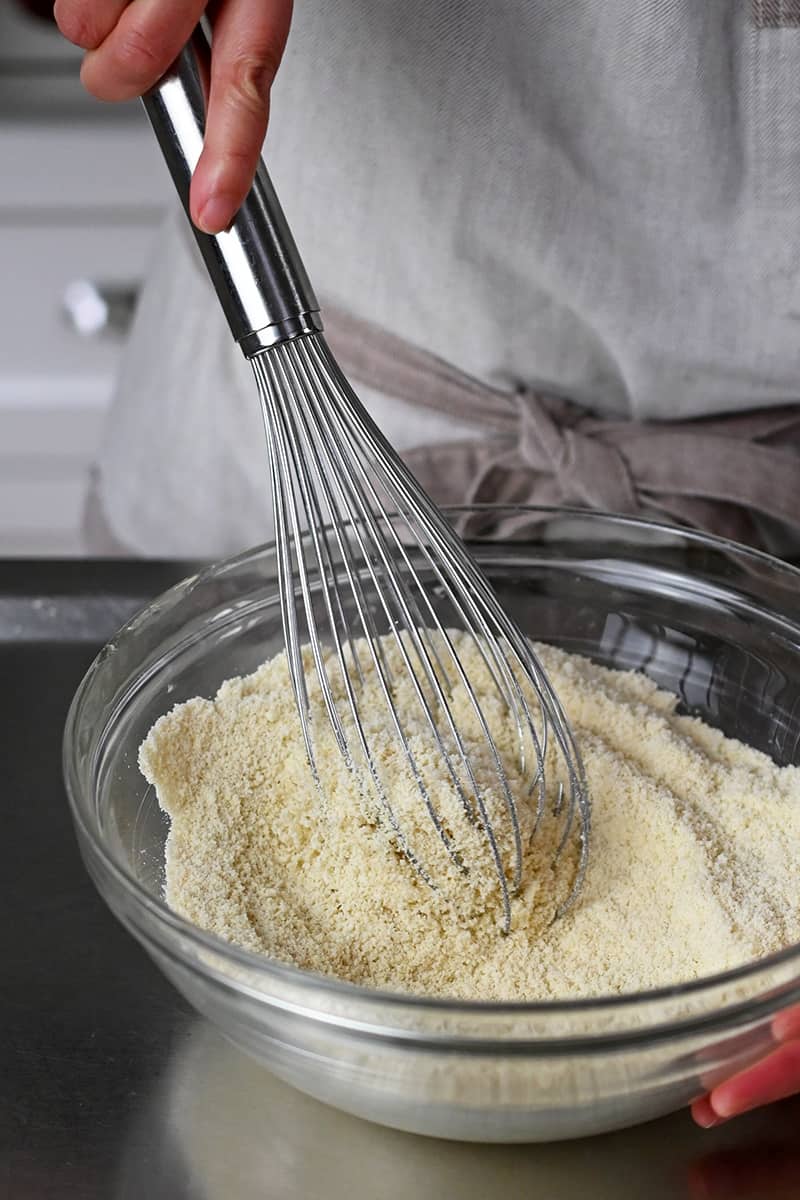
- Mix the dry ingredients
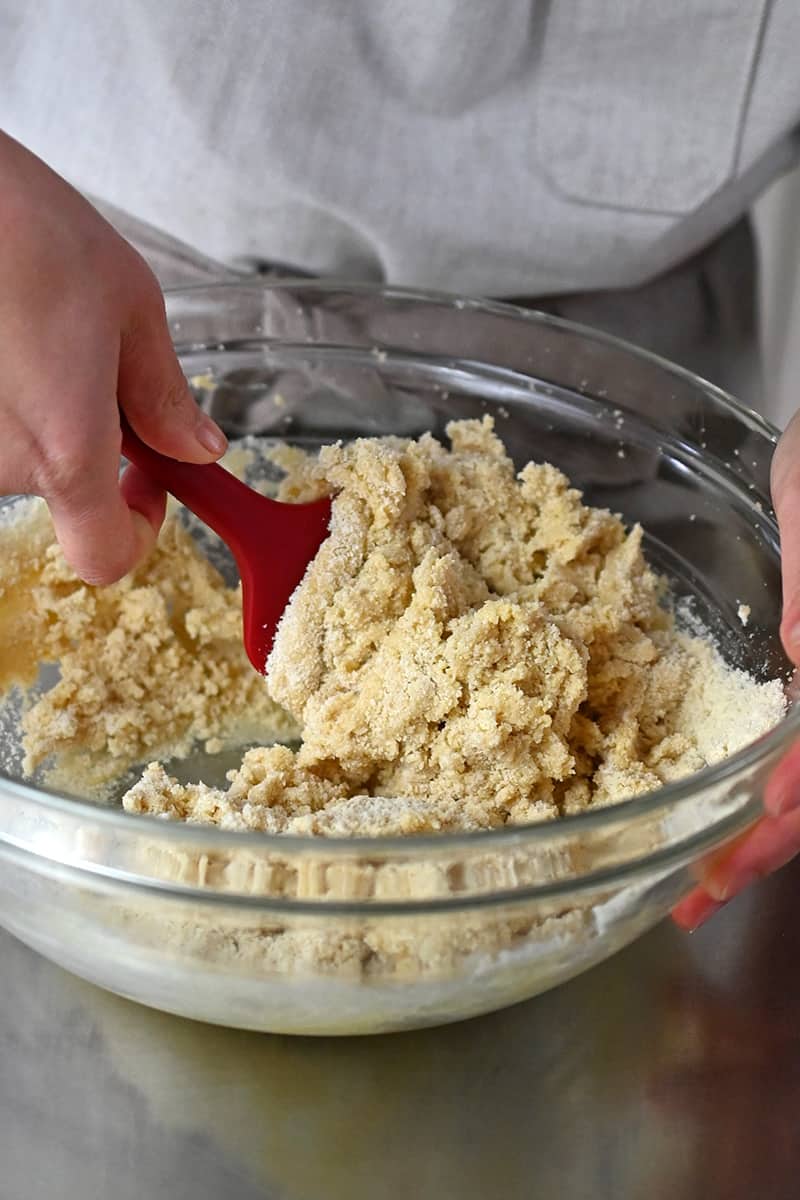
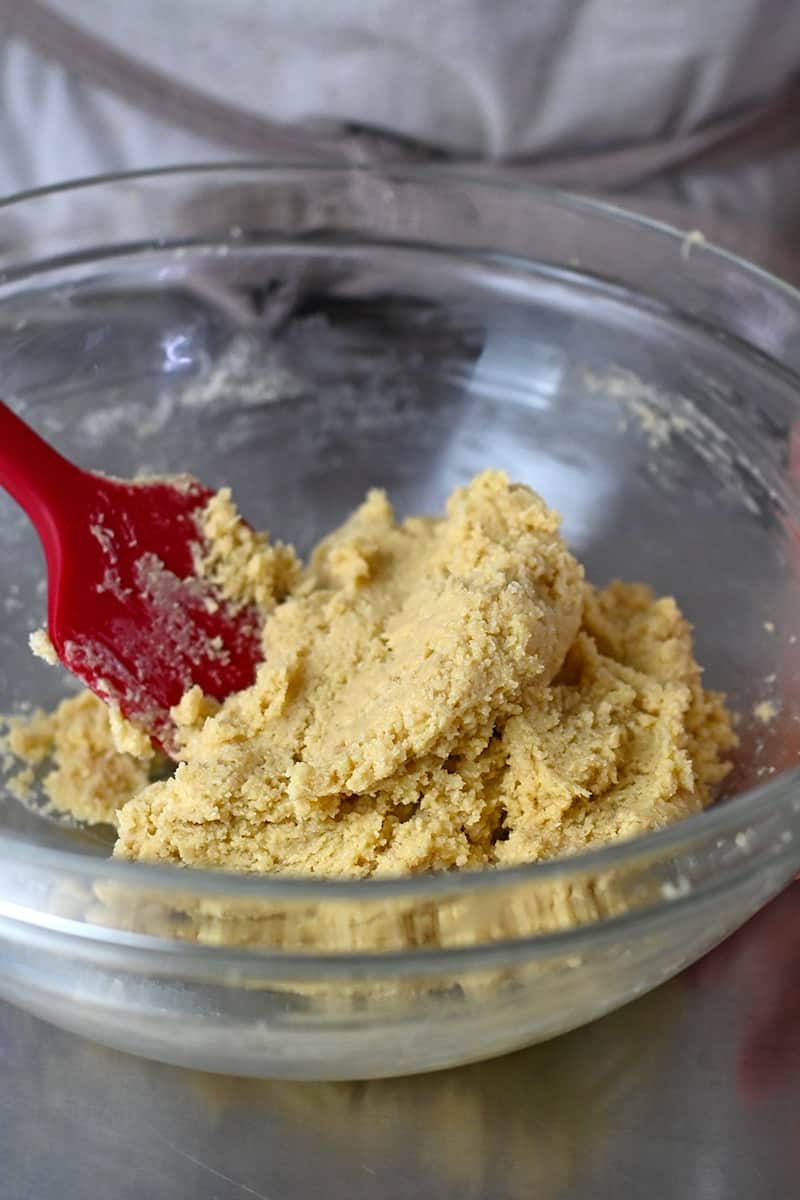
- Combine the wet and dry ingredients
- Chill the dough
- Heat the oven
- Form the thumbprint cookies
- Bake the cookies
- Cool the cookies
- How to store the cookies
- Other paleo holiday treats
- Thumbprint Cookies (Gluten Free, Paleo, Grain Free) Recipe
The perfect holiday cookie!
I may be paleo, but I love cookies. The ones I dream about the most are thumbprint cookies—buttery shortbread cookies filled with tangy and sweet jammy centers. With holiday baking on the brain, I made it my mission to recreate a crave-worthy paleo version that tastes like the real thing.
Ingredients
These cookies are made with 8 simple ingredients that many of us already have in the pantry:
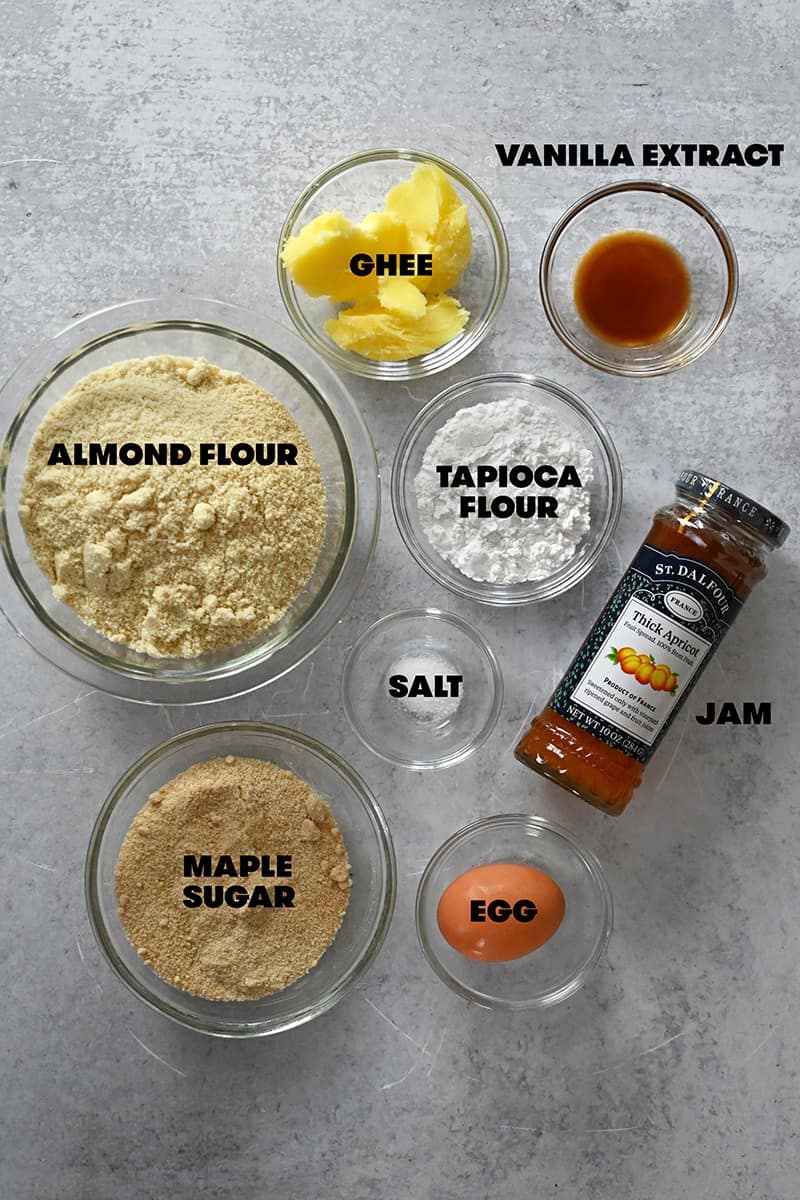
- Ghee, refined coconut oil, or palm shortening: In place of butter, the traditional ingredient in these cookies, I prefer ghee. Avoiding ghee? Coconut oil, and sustainably-farmed palm shortening also work well. Please note that whichever fat you choose needs to be softened at room temperature before using.
- Maple sugar or coconut sugar: To ensure a delicate crumb and a lighter texture, you need to cream granulated sugar and fat together. My preferred paleo granulated sugar is maple sugar (I buy this brand online) but coconut sugar also works. Please be aware that coconut sugar will result in a darker cookie with more overtones of molasses.
- Almond flour: The flour base of this cookie dough is mostly almond flour with a little tapioca flour. I’m not sure if you can replace almond flour with cassava flour, but it might be a good choice if you must eat nut-free. If you try this out, let me know in the comments how your cookies turn out!
- Tapioca flour: Tapioca flour helps lighten the cookie dough. You can sub arrowroot powder/starch if you don’t have tapioca on hand.
- Egg: The egg helps bind the cookie together and gives it more structure and richness. If you must leave it out, you can sub in 2 tablespoons of applesauce or Nutpods but the cookie will spread out more and be softer. Egg replacer may work, but I haven’t tried it. Please let me know in the comments what egg replacement works best!
- Diamond Crystal kosher salt: Every dessert is enhanced with a smidge of salt and these cookies are no different.
- Vanilla extract: A hint of vanilla makes every cookie taste better, but feel free to use almond extract instead if you want a nuttier tasting cookie!
- Jam sweetened with only fruit juice: You can make your own paleo-friendly jam, but for ease I just buy 100% fruit-sweetened jams. My favorite brand is St. Dalfour and I love the strawberry, raspberry, and apricot jam flavors in these thumbprint cookies. Yep, this is the same brand of jam I use in my Paleo Char Siu recipe!
How to make thumbprint cookies
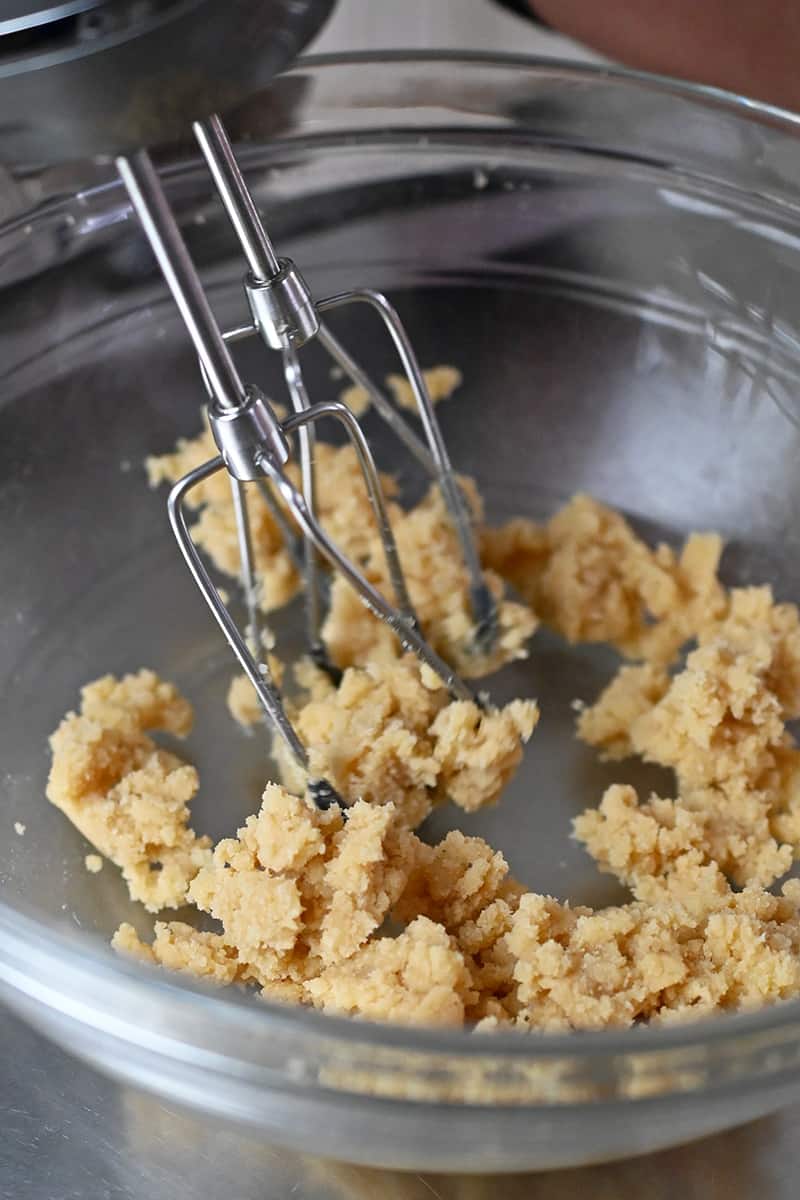
Cream the sugar and fat
Plop the maple sugar and softened ghee into a large bowl and beat on low speed with an electric hand mixer or stand mixer with paddle attachment until well-combined.
Add the wet ingredients
Crack in the egg and pour in the vanilla extract.
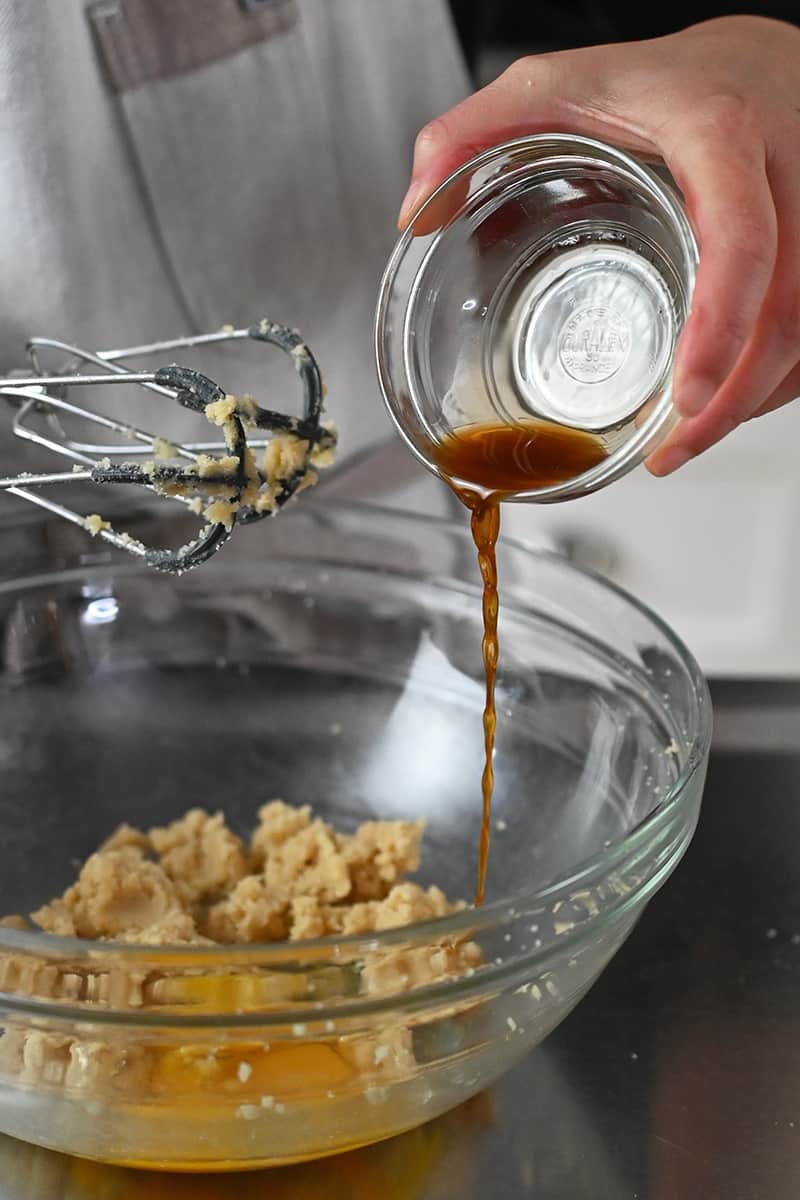
Beat the wet ingredients until smooth.
Mix the dry ingredients
In a separate medium bowl, whisk together the almond flour, tapioca flour, and salt.
Combine the wet and dry ingredients
Pour the whisked dry ingredients into the bowl with the wet ingredients. Using a spatula or wooden spoon, stir until well combined.
Chill the dough
Cover the bowl and chill in the fridge for 30 minutes. Chilling the dough makes it easier to form the thumbprint cookies.
Heat the oven
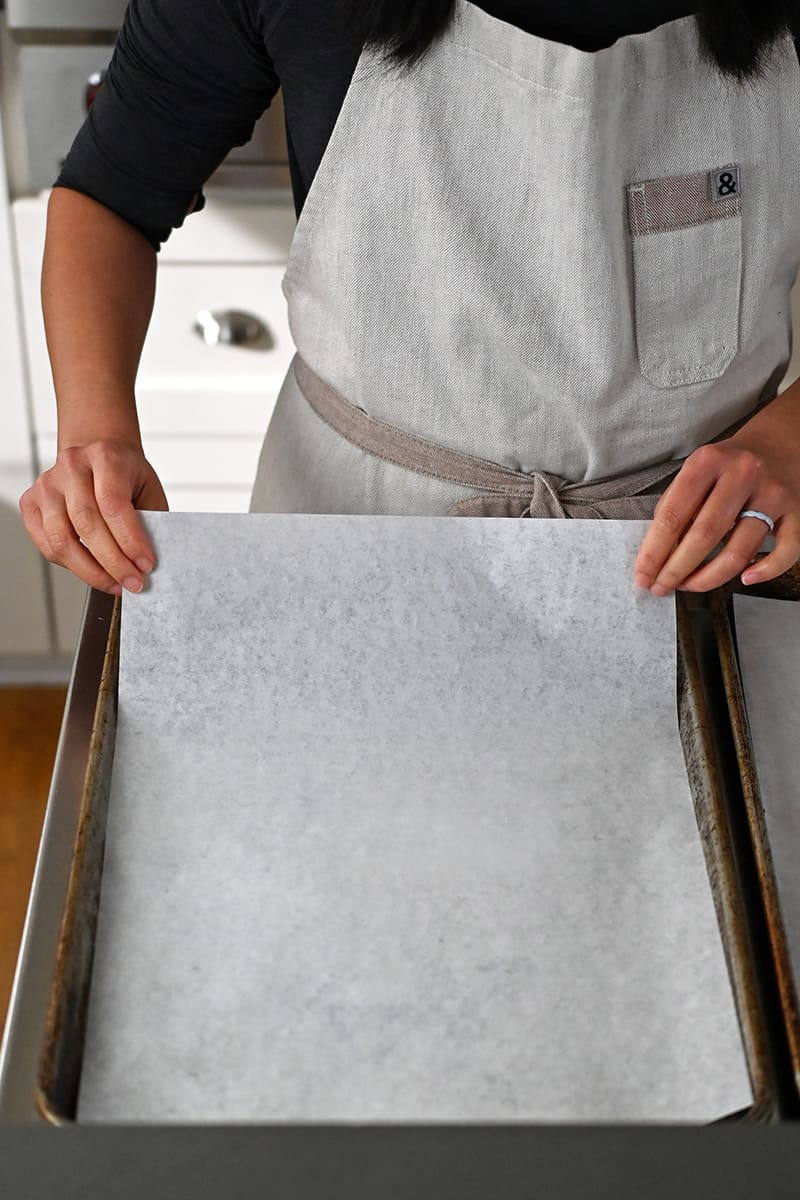
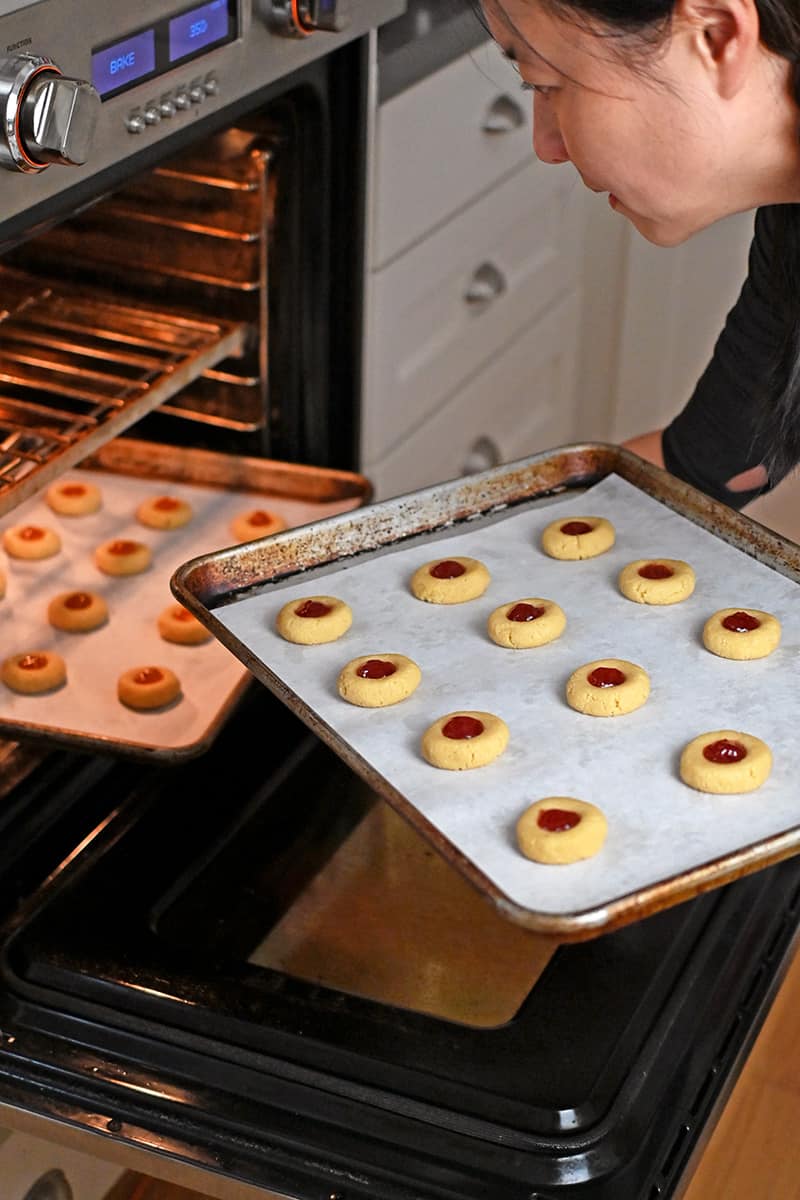
When you’re ready to bake the cookies, heat the oven to 350°F with the racks in the upper and lower thirds of the oven. Then, line two rimmed baking sheets or cookie sheets with parchment paper. Set aside.
Form the thumbprint cookies
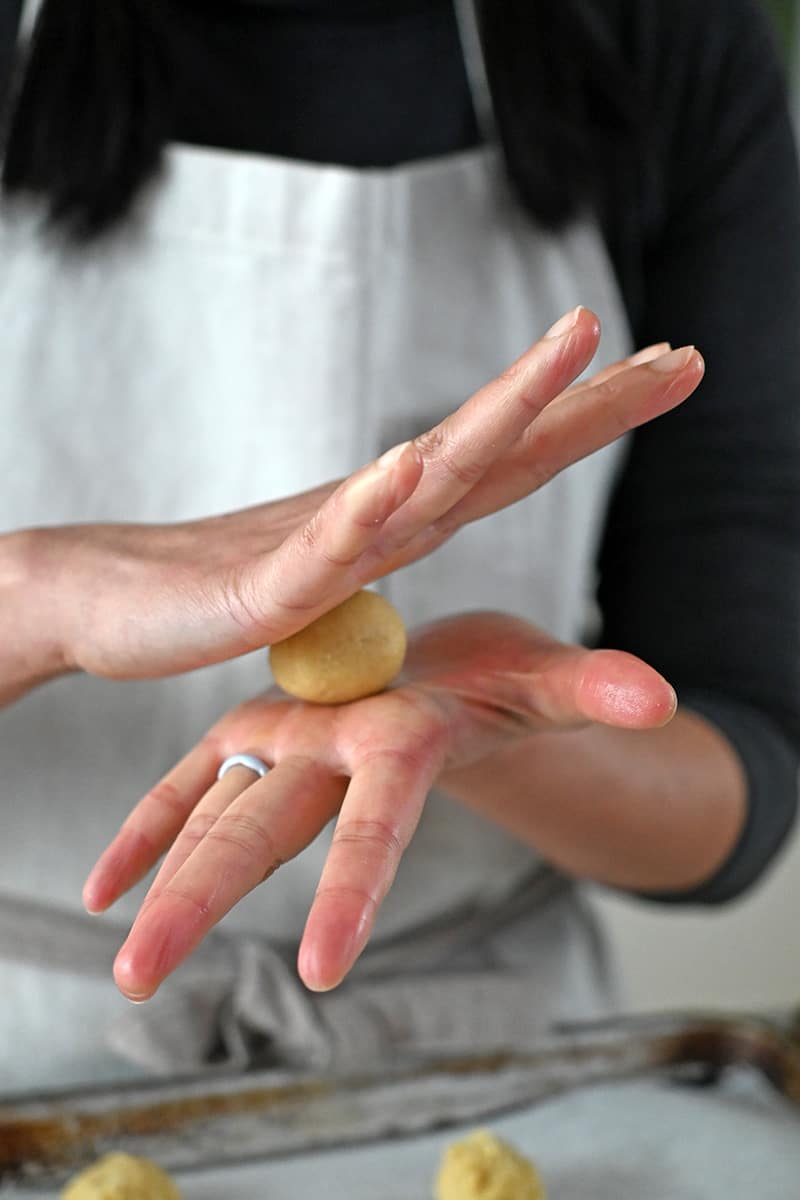
Use a small cookie scoop to portion out 24 balls of dough. Then, use your hands to roll them into balls that are about 1-inch in diameter.
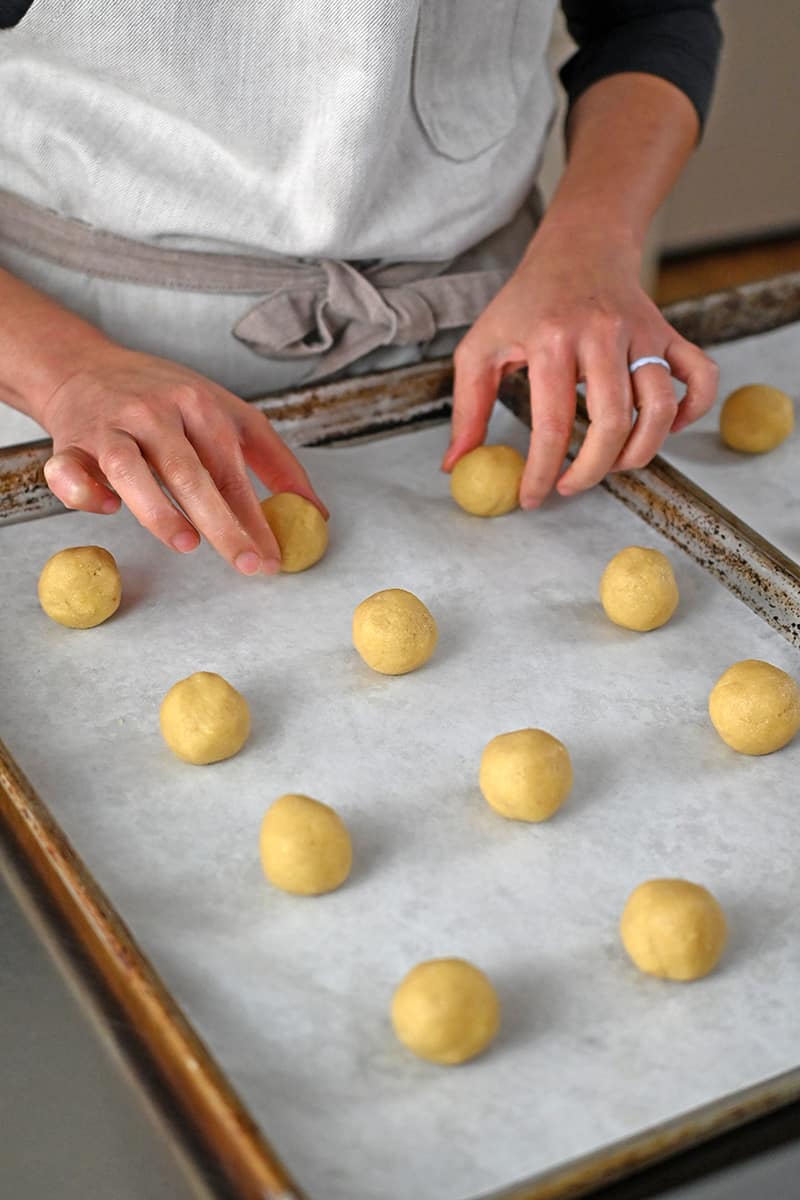
Evenly arrange the balls of dough on two baking sheets.
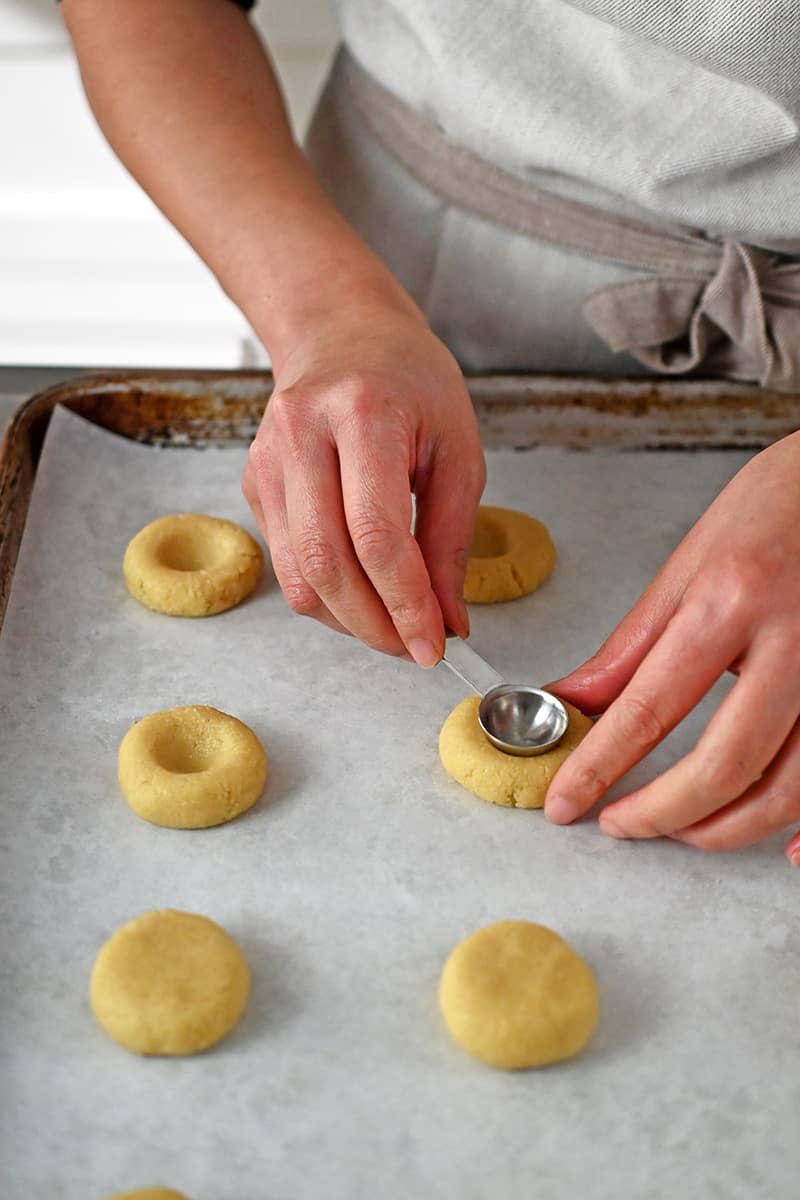
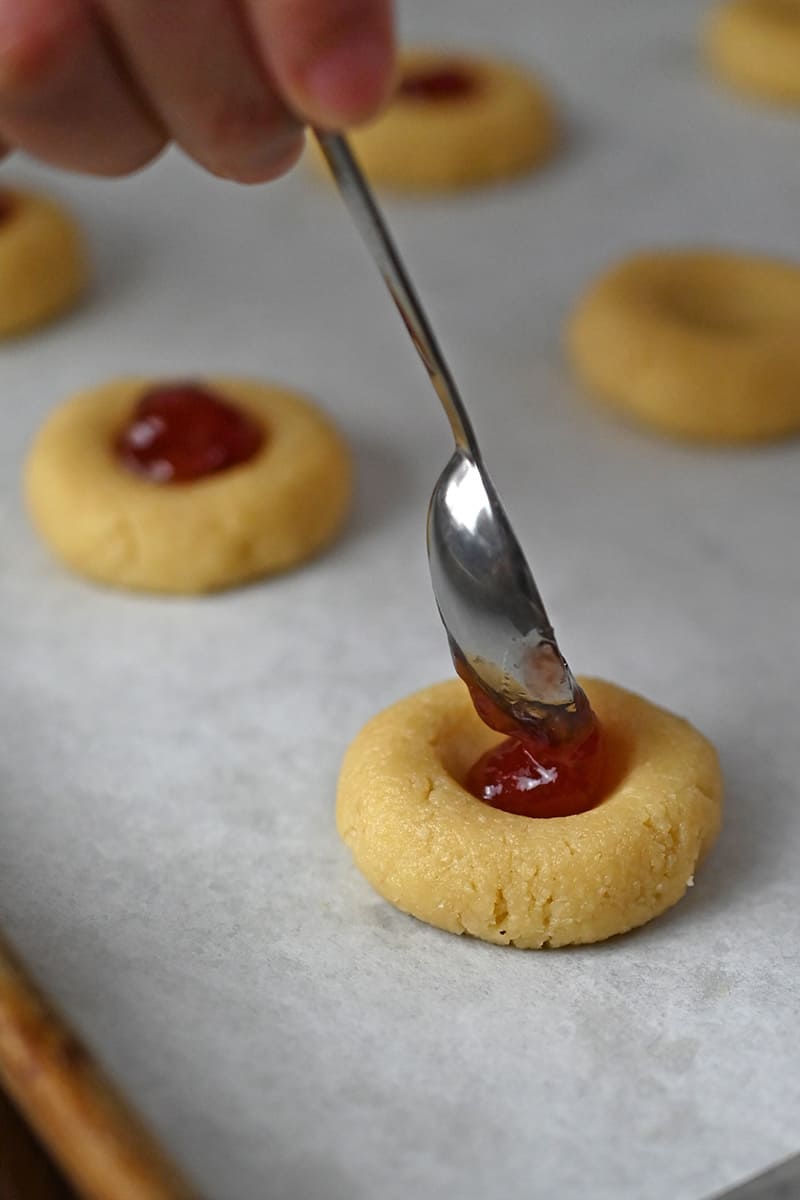
Press down on each dough ball with a flat surface (like the bottom of a measuring cup or your fingers) until it’s about ½-inch thick. Then, to make the indent in the middle, you can use your thumb or the back of a ½-teaspoon measuring spoon.
Carefully spoon some jam into the center of each cookie. I like to use a narrow ¼-teaspoon measuring spoon to add the jam to the middle.
Bake the cookies
Pop the two trays in the oven and bake the cookies for 11 to 13 minutes, rotating the trays at the halfway point. The cookies are done when the edges turn a light golden brown and the bottoms are golden.
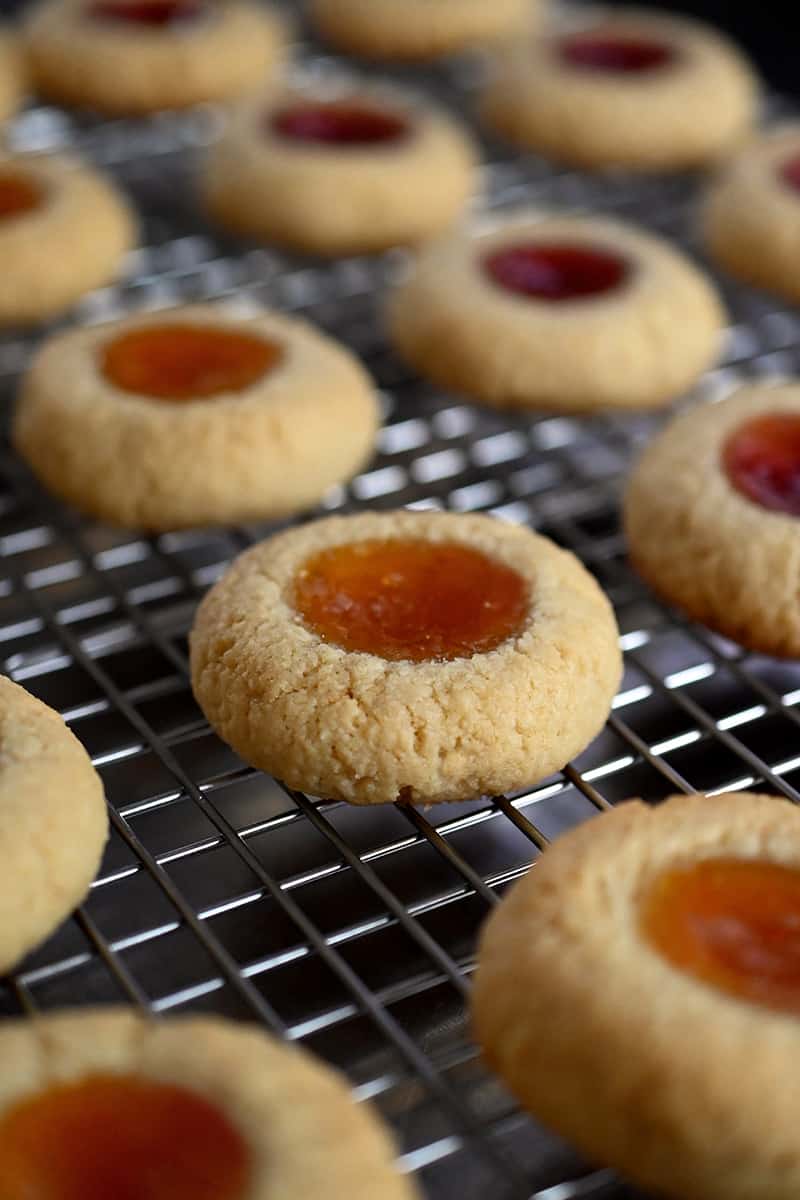
Cool the cookies
Cool the cookies on the trays for 5 minutes and then transfer them to a wire rack to cool completely.
How to store the cookies
Because of the jam filling, the cookies will be a little softer the next day but I’ve got some tips below that will keep them tasty for several days (or longer)!
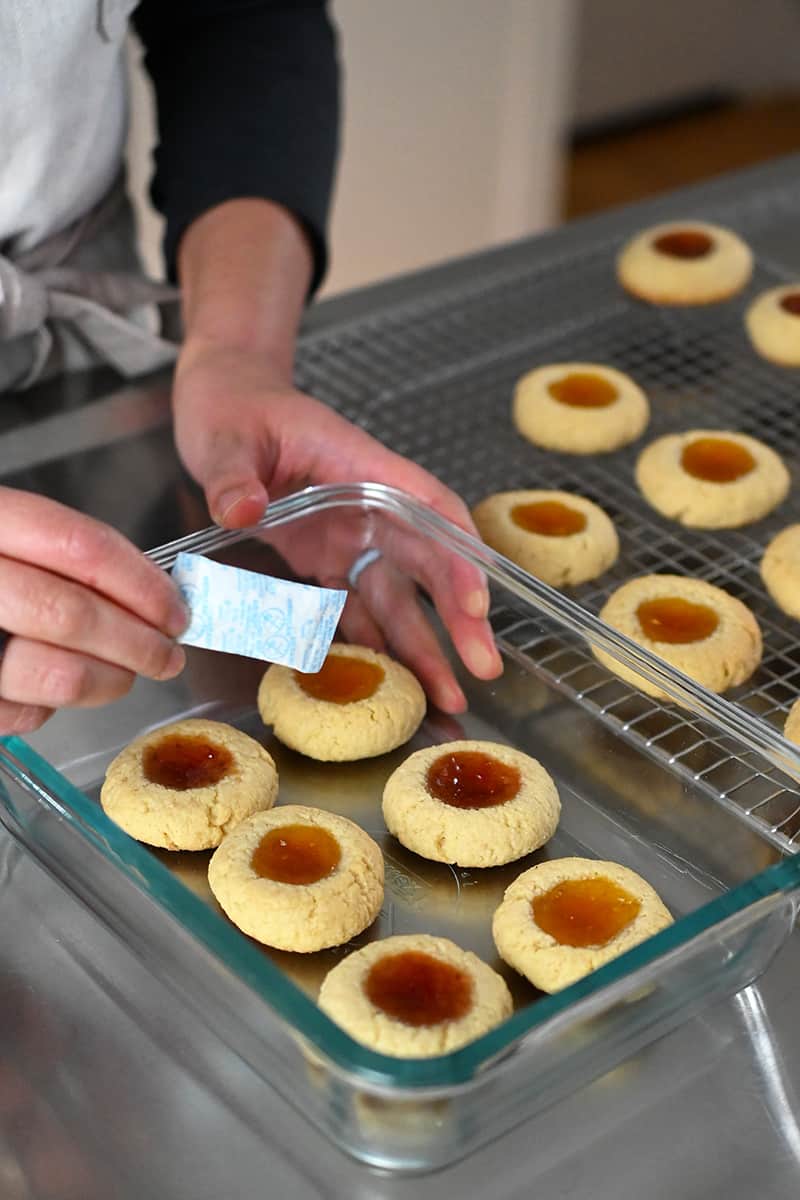
If you have leftover cookies, here are some storage tips:
- Completely cool the cookies before storing them.
- Store the cookies in a single layer in an airtight container. If you need more than one layer, place a piece of parchment in between each layer.
- Add a silica packet to the container (it acts as a desiccant and will absorb extra moisture) if you have one. This is totally optional, but it doesn’t hurt! (Every year, I start hoarding these packets in November from packaged goods and supplements for holiday cookie storage.)
- Keep at room temperature for up to 5 days or in the fridge for up to two weeks. I’ve also wrapped baked cookies in parchment and placed them in airtight containers in the freezer for up to two months. I just take out a frozen cookie and thaw it at room temperature for about an hour before eating!
Other paleo holiday treats
Here are some of my favorite holiday treats that you can give away as Christmas gifts:
Looking for more recipe ideas? Head on over to my Recipe Index. You’ll also find exclusive recipes and in my cookbooks, Nom Nom Paleo: Food for Humans (Andrews McMeel Publishing 2013), Ready or Not! (Andrews McMeel Publishing 2017), and Nom Nom Paleo: Let’s Go! (Andrews McMeel Publishing 2022).
PRINTER-FRIENDLY RECIPE CARD
Thumbprint Cookies (Gluten Free, Paleo, Grain Free)
Ingredients
- ¾ cup maple sugar or coconut sugar
- ⅓ cup ghee or coconut oil or palm shortening, softened at room temperature
- 1 large egg
- 1 teaspoon vanilla extract
- 2 cups finely ground almond flour
- ⅓ cup tapioca flour
- ¼ teaspoon Diamond Crystal kosher salt
- ⅓ cup fruit jam sweetened with only fruit juice
Instructions
- Combine the maple sugar and softened fat into a large bowl. Beat on low with an electric mixer or stand mixer with the paddle attachment until well-combined.
- Add the egg and vanilla extract to the bowl and beat well until completely mixed.
- In a separate medium bow, whisk together the almond flour, tapioca, and salt.
- Pour the dry ingredients into the bowl with the wet ingredients. Use a spatula or wooden spoon to mix until a uniform dough forms.
- Cover the bowl and chill the dough in the refrigerator for at least 30 minutes.
- When you’re ready to bake the cookies, heat the oven to 350°F with the racks set in the upper and lower thirds of the oven. Line two baking sheets or cookie sheets with parchment paper.
- Use a small cookie scoop to portion out 24 dough balls. Roll them with your hands until they form 1-inch balls. Arrange them evenly on the two lined baking sheets, 12 balls on each one.
- Press down on each dough ball with your fingers or the bottom of a flat measuring cup until it's ½-inch thick. Use your thumb or the bottom of a ½-teaspoon measuring spoon to make an indentation in the center of each cookie.
- Add a heaping ¼-teaspoon of jam to the center of each cookie.
- Bake the cookies for 11 to 13 minutes, rotating the trays at the halfway point,. The cookies are down when the edges turn light golden brown and the bottoms are golden.
- Transfer the cookies to a wire rack to cool completely before eating or storing.
Video
Notes
- Chill the dough for at least 30 minutes to make it easier to form the cookies.
- Use a store-bought jam, sweetened with 100% fruit to make these cookies in a flash.
-
Cookie storage tips:
- Completely cool the cookies before storing them.
- Store the cookies in a single layer in an airtight container. If you need more than one layer, place a piece of parchment in between each layer.
- Add a silica packet to the container (it acts as a desiccant and will absorb extra moisture) if you have one. Totally optional, but it doesn’t hurt! (I actually start hoarding these packets in November from packaged goods and supplements for this very purpose.)
- Keep at room temperature for up to 5 days or in the fridge for up to two weeks. I’ve also frozen the baked cookies wrapped in parchment and placed in airtight containers for up to two months. I just take out a frozen cookie and thaw it at room temperature for about an hour before eating!
Nutrition
Nutrition information is automatically calculated, so should only be used as an approximation.


I’m so sorry to be this person, but I live in Europe and alternative sugars like maple (which I’ve never seen) and coconut (which I can get for something like 12€) are hard to come by. Can I just use regular sugar?
Yes!
my dough is so dry not mixing what can I add? I already added more ghee. it’s not sticking together? it’s like a dryer brown sugar consistency… I assume because I used coconut sugar not maple but what do I do now ? 😭
Not sure! Coconut sugar will work in the cookies? Did you use a large egg? Did you measure the ingredients with a kitchen scale?
Took these to a New Years Eve party and they were a hit, even among those without dietary restrictions! Making more tonight- only a week later! Thanks!
Best recipe! I make these all the time!