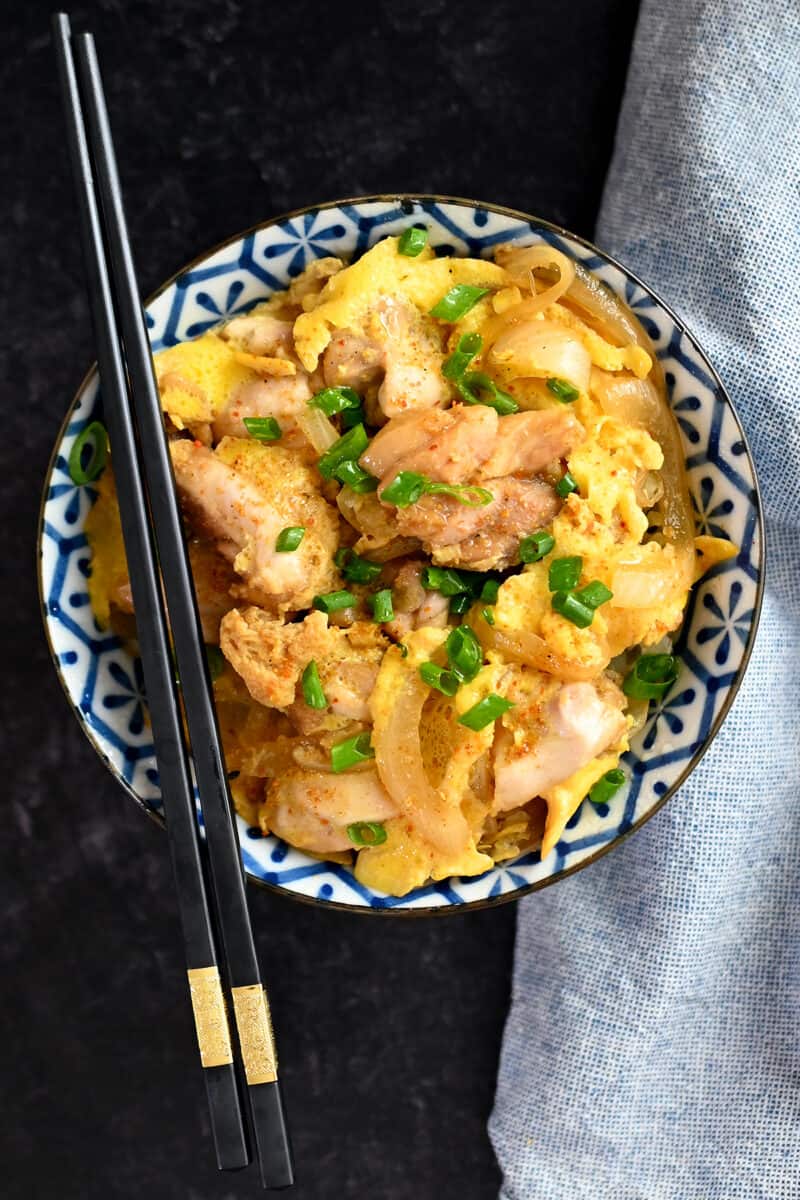
This low-carb, gluten free, Whole30, and paleo oyakodon recipe is a super simple, fast, and delicious take on a classic Japanese chicken and egg rice bowl!
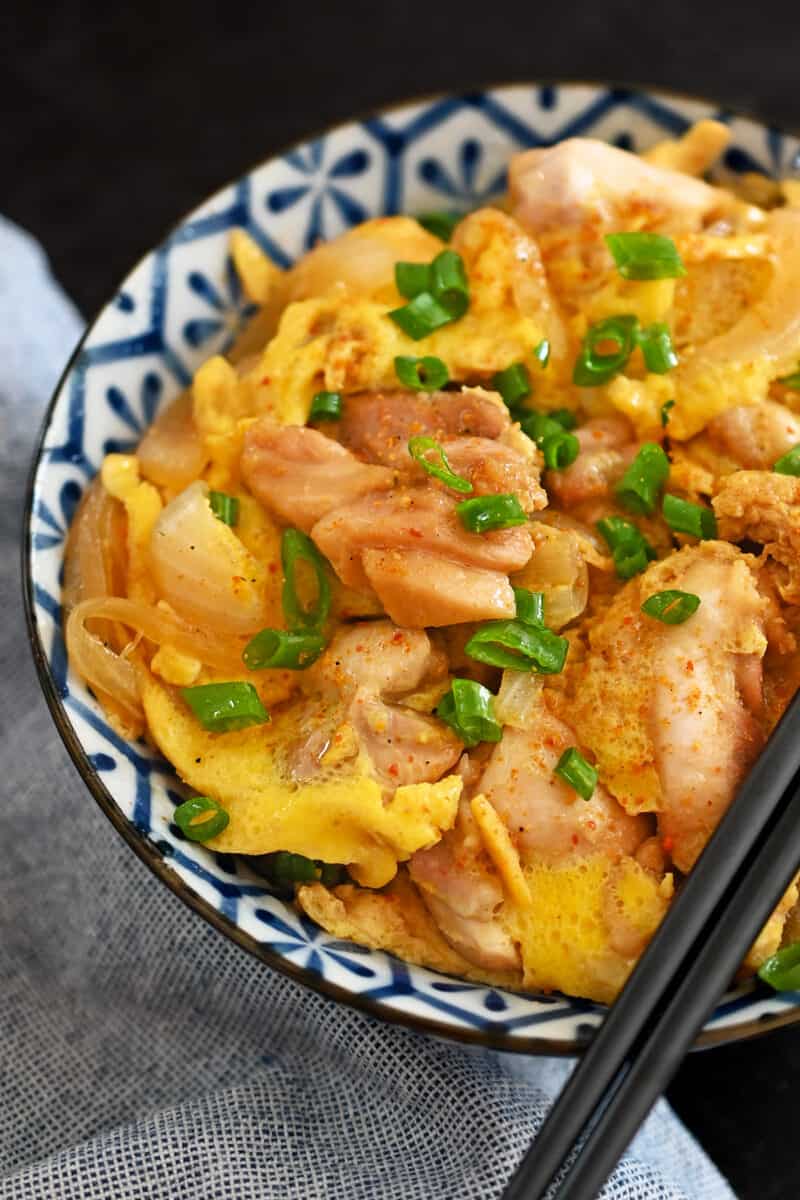
Table of Contents
What is Oyakodon?
Oyakodon or Japanese chicken and egg rice bowl, is a classic comfort food dish that consists of bite-sized boneless chicken and thinly sliced onions simmered in an umami-packed sauce typically made with soy sauce, mirin, sake, dashi, and sugar. It’s similar to gyudon (Japanese beef bowl) in that the meat and onions are simmered in a savory sauce and served over rice (a.k.a. donburi).
Oyakodon’s a popular chicken dish that’s both served in Japanese restaurants and cooked at home because it’s an easy, fast, and filling one-bowl meal.
All Purpose Stir Fry Sauce is my secret weapon!
I love Japanese food, but I rarely eat it when I dine out because the gluten in the soy sauce can do a number on me. Plus, my blood sugar tends to spike when I eat too much white rice, so I have to stick to a lower carb eating approach. Undeterred, I’ve come up with paleo versions of my favorite Japanese dishes, like Gyudon (Japanese Beef Bowl), Tsukune (Japanese Chicken Meatballs), Chawanmushi (Savory Egg Custard), Beef and Enoki Mushroom Rolls, and California Hand Rolls.
What’s made this task easier was my All-Purpose Stir-Fry Sauce, which I invented a few years ago for our second cookbook, Ready or Not!. I knew that the flavor profile of my All-Purpose Stir-Fry Sauce could be used in numerous recipes to mimic lots of Asian sauces. Not surprisingly, my sauce works perfectly in this oyakodon copycat recipe, too—and as a result, this dish is gluten free, Whole30-compatible, soy free, low carb, and oh-so-delicious!
I’ve said it a million times before, but I named it All-Purpose Stir-Fry Sauce for a reason—it literally works for ALL PURPOSES!—so make sure you always have a jar in the refrigerator.
Tips on making the best soy-free oyakodon
- Make one serving at a time! Traditionally, this dish is cooked in single serving portions in a special oyakodon pan. I use a small 8-inch nonstick pan or a well-seasoned cast iron skillet to cook my single serving . It’s the perfect one-person dish and I can cook the egg just the way I like it! If you need to feed more mouths and don’t want to be a short order cook, you can definitely quadruple the ingredients and cook a meal for four in a 12-inch skillet.
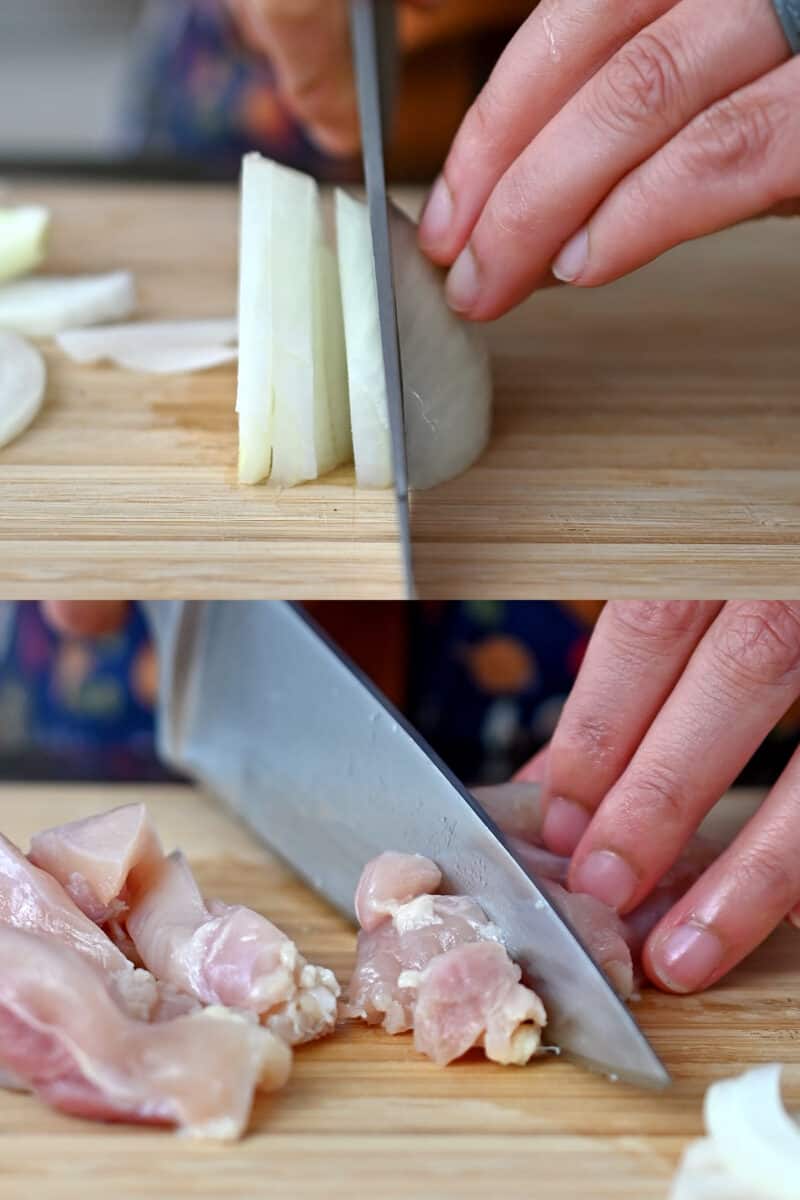
- Cut the onions and chicken properly! Thinly slice the onions so they’re about a quarter inch thick and the chicken pieces are small and uniform. You want the oyakodon to cook quickly and evenly!
- Don’t skimp on the sauce ingredients: The traditional sauce ingredients are already replaced with my All-Purpose Stir-Fry Sauce, so there’s no need to change anything else up! The reason this paleo oyakodon still tastes like the real thing is the sauce, people! Also, to keep things paleo, make sure you make a traditional dashi broth with just kombu and bonito flakes or use a compatible chicken broth. Instant dashi is almost always not Whole30-compatible.
Ingredients
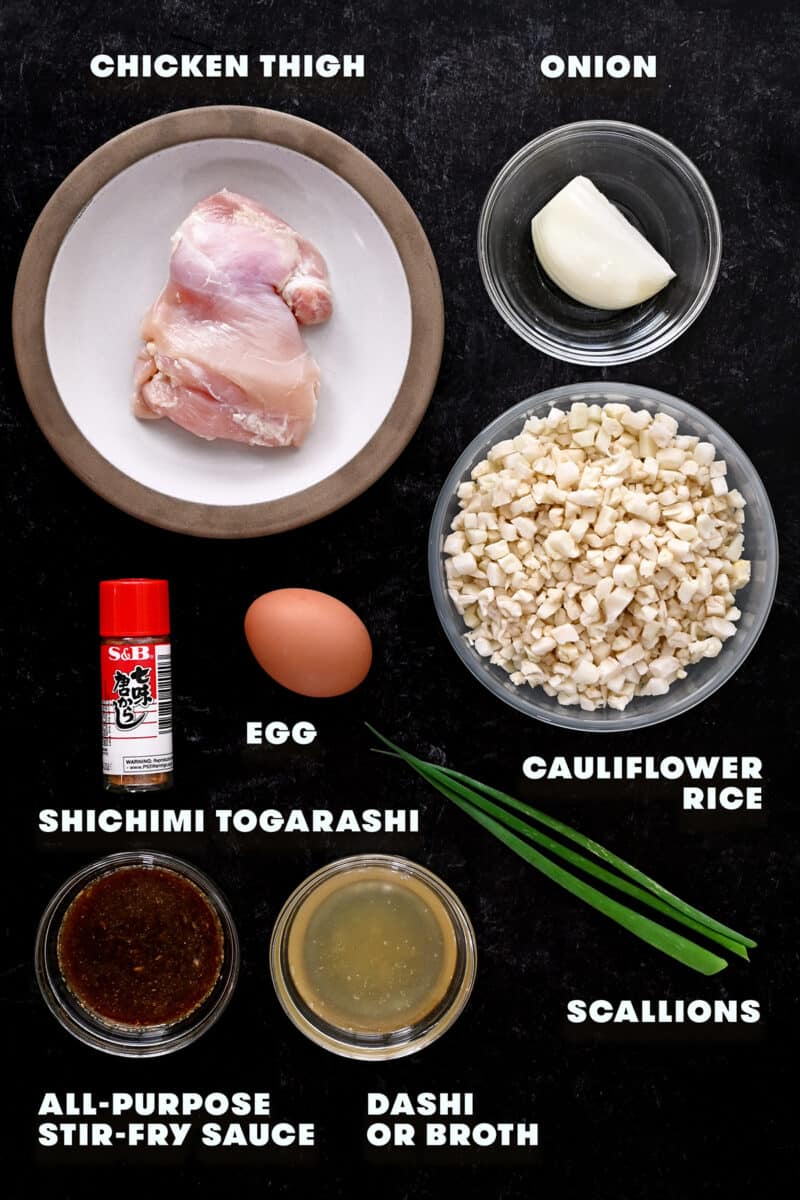
- Onion: You just need to use a quarter of a small onion—any color will do! Thinly slice the onion so it will cook quickly.
- Boneless, skinless chicken thigh: I prefer to use chicken thighs for the flavor, but feel free to use chicken breast if you so desire. If you substitute chicken breast, make sure you don’t overcook it!
- All-Purpose Stir-Fry Sauce: This magical sauce works perfectly as a gluten-free and Whole30 substitute! Check out this post for other dishes to use it in!
- Dashi stock or chicken broth: To keep this dish Whole30 compatible, make your own dashi. To be honest, I normally use chicken broth because that’s what I always have on hand.
- Egg: If you want to make this dish even heartier, use two large eggs instead of just one! Make sure you whisk the eggs well so the texture is soft when you cook it.
- Cooked cauliflower rice: To keep the dish low carb, paleo, and Whole30, use cooked cauliflower rice as the base of the bowl rather than steamed white rice.
- Scallion/green onion or mitsuba: Oyakodon is traditionally garnished with chopped mitsuba, a Japanese herb that is similar to parsley. I normally just sprinkle on some thinly sliced scallions for a pop of green and freshness.
- Shichimi togarashi (optional): If you like spicy, add a sprinkle of this zesty and spicy Japanese spice blend.
How to make oyakodon
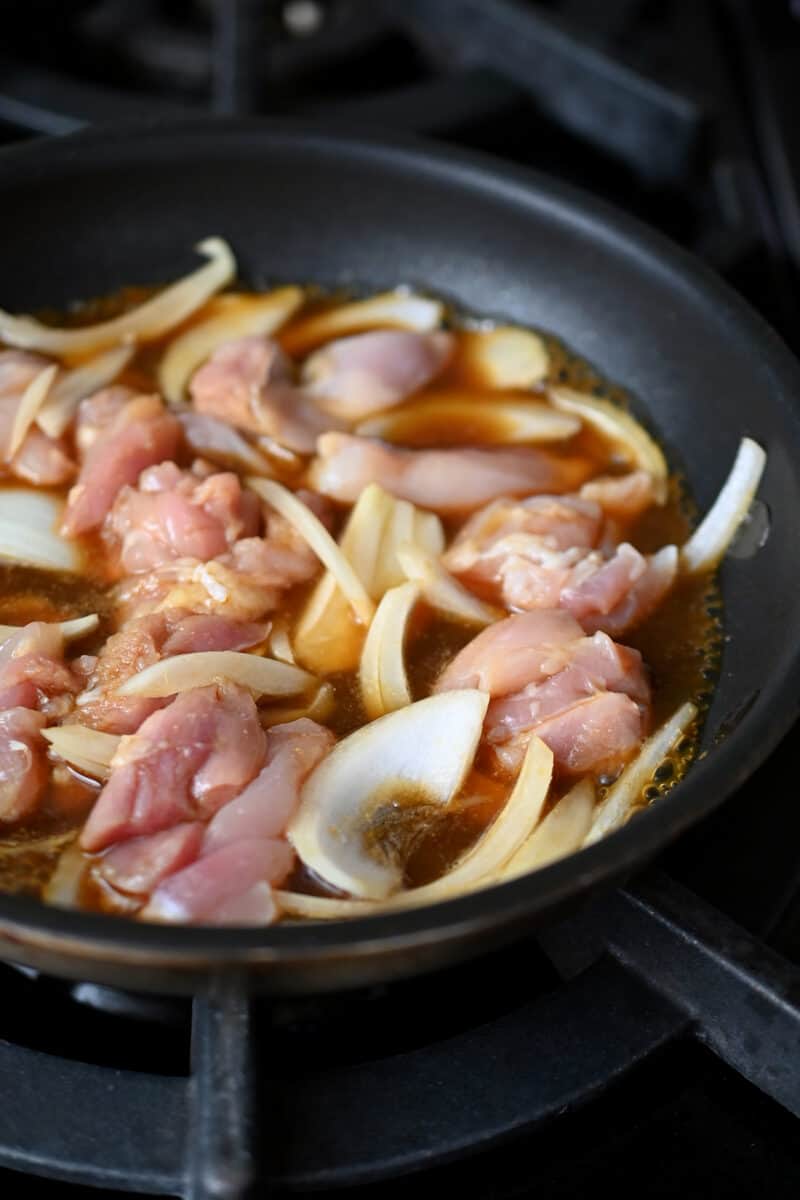
Thinly slice the onion and cut the chicken into small bite-sized pieces.
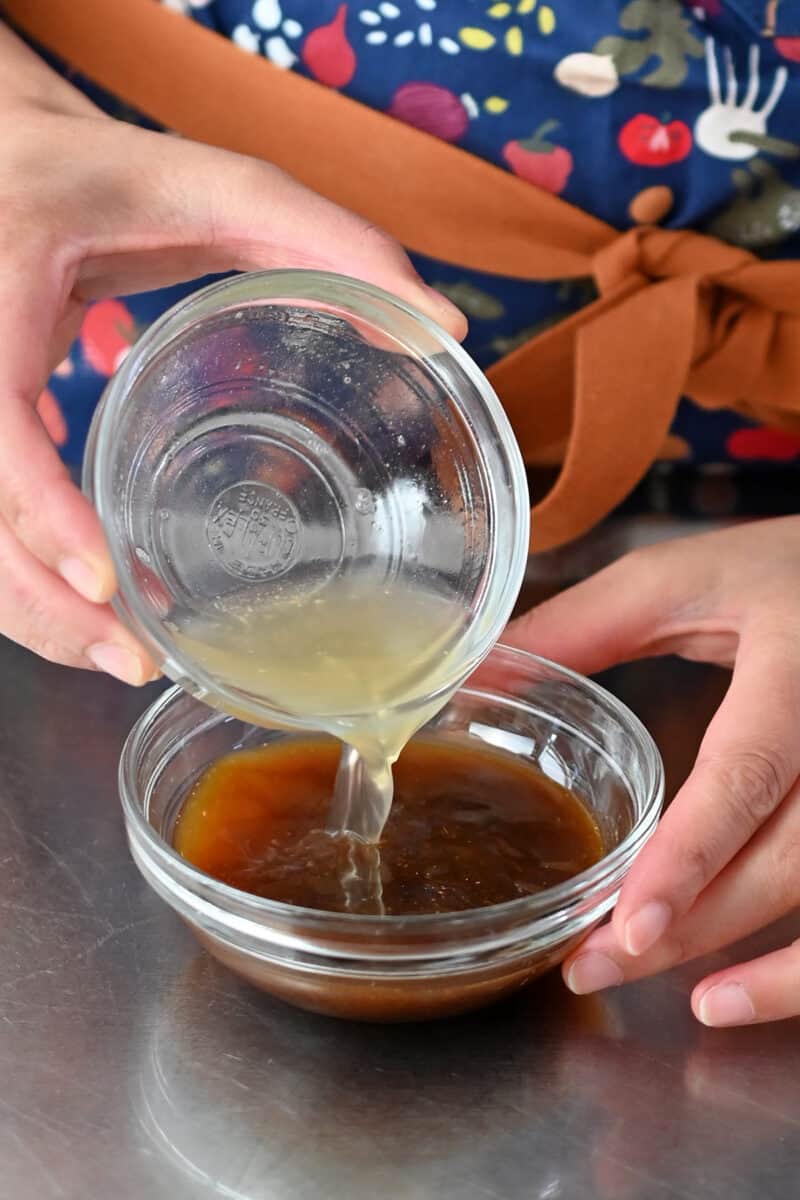
In a small bowl or measuring cup, stir together the All-Purpose Stir-Fry Sauce and dashi or chicken broth.
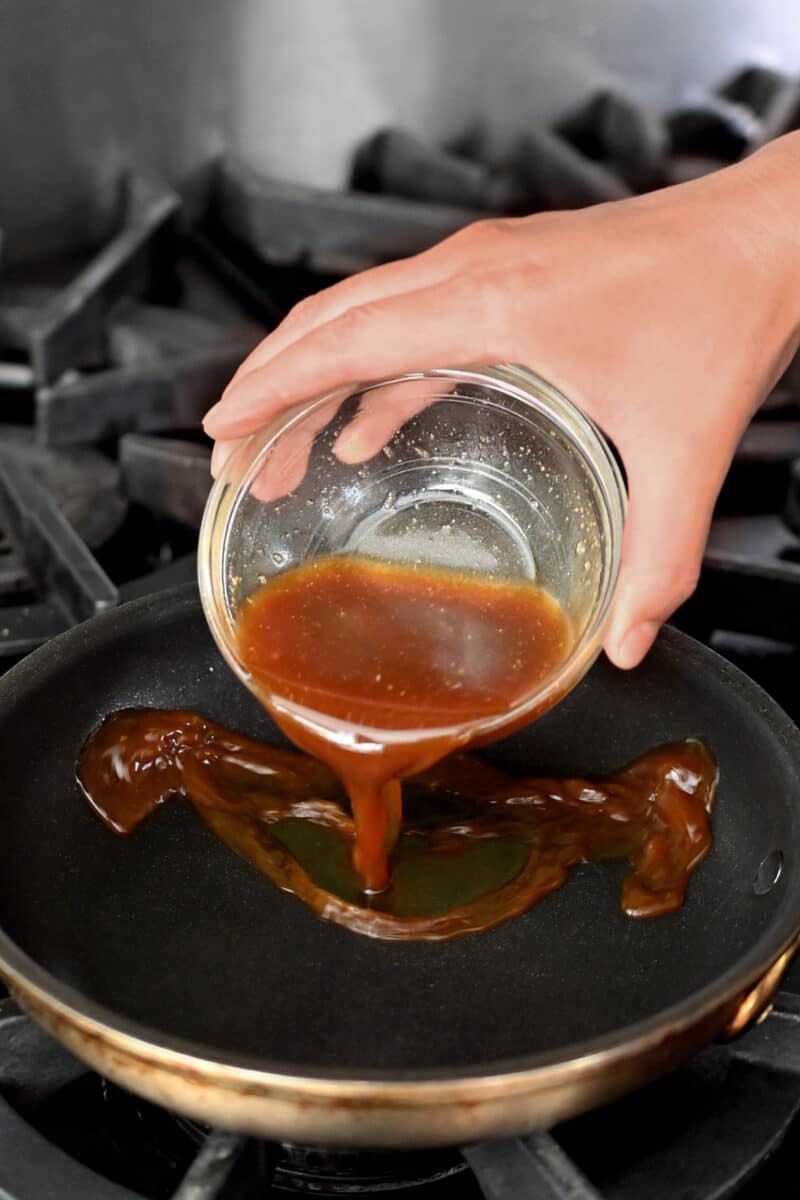
Pour the sauce mixture into an 8-inch non-stick or well seasoned cast iron skillet.
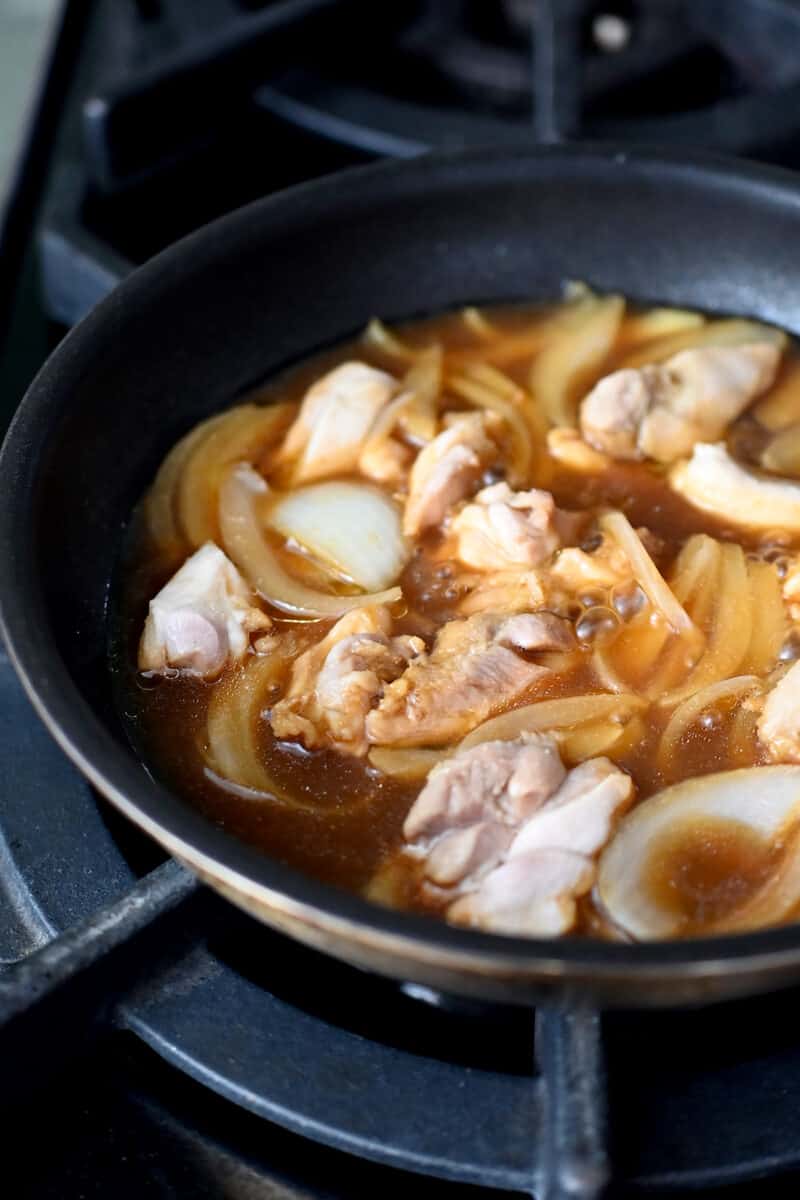
Add the onion and chicken pieces to the pan and arrange them in a single layer.
Turn the heat to medium high and bring the sauce to a simmer. Then, lower the heat to maintain a simmer, about medium low, and cover the pan with a lid.
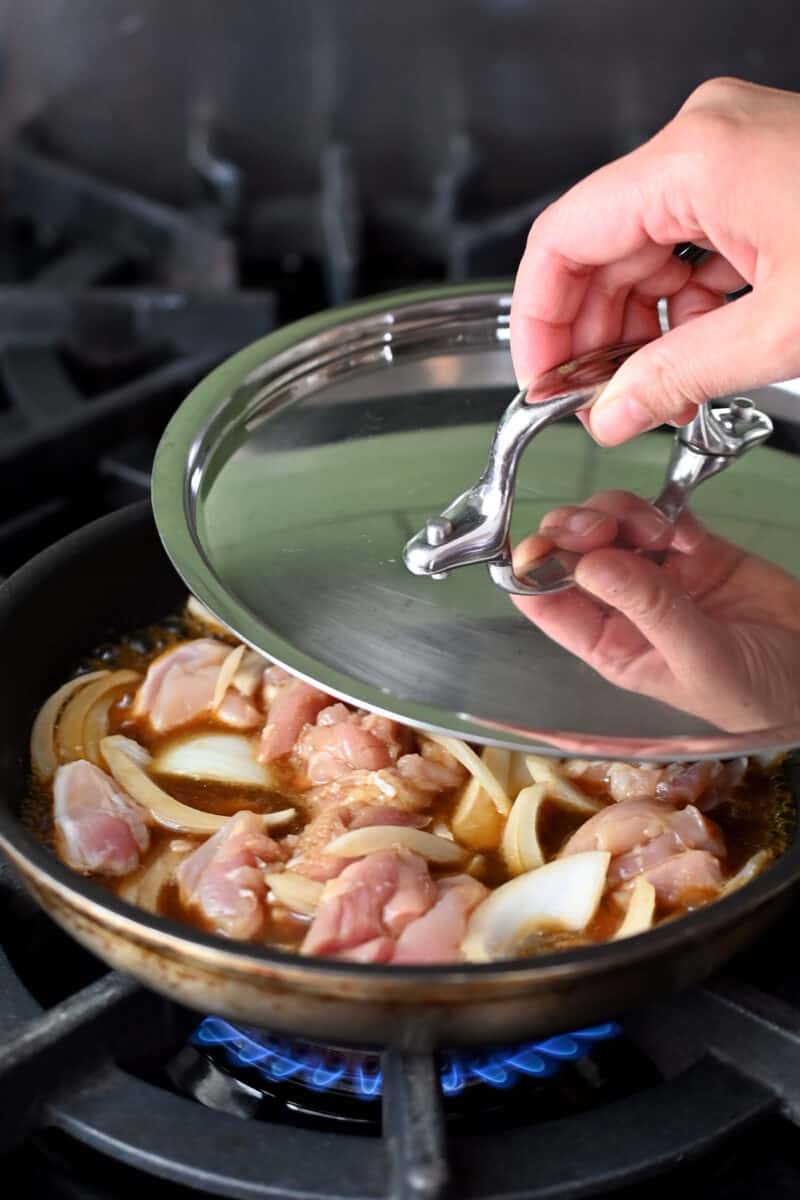
Cook, covered, until the chicken is no longer pink and the onions are mostly tender, about 5 minutes.
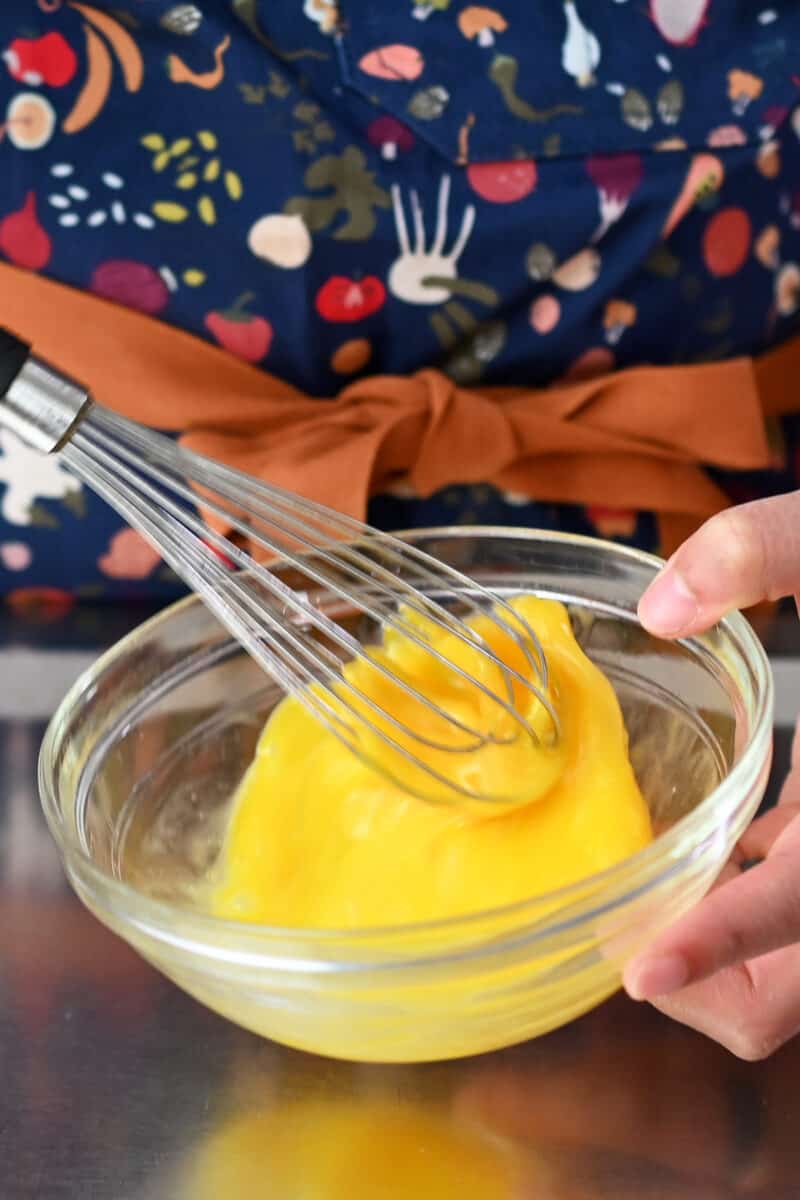
In a small bowl, whisk the egg until nice and frothy.
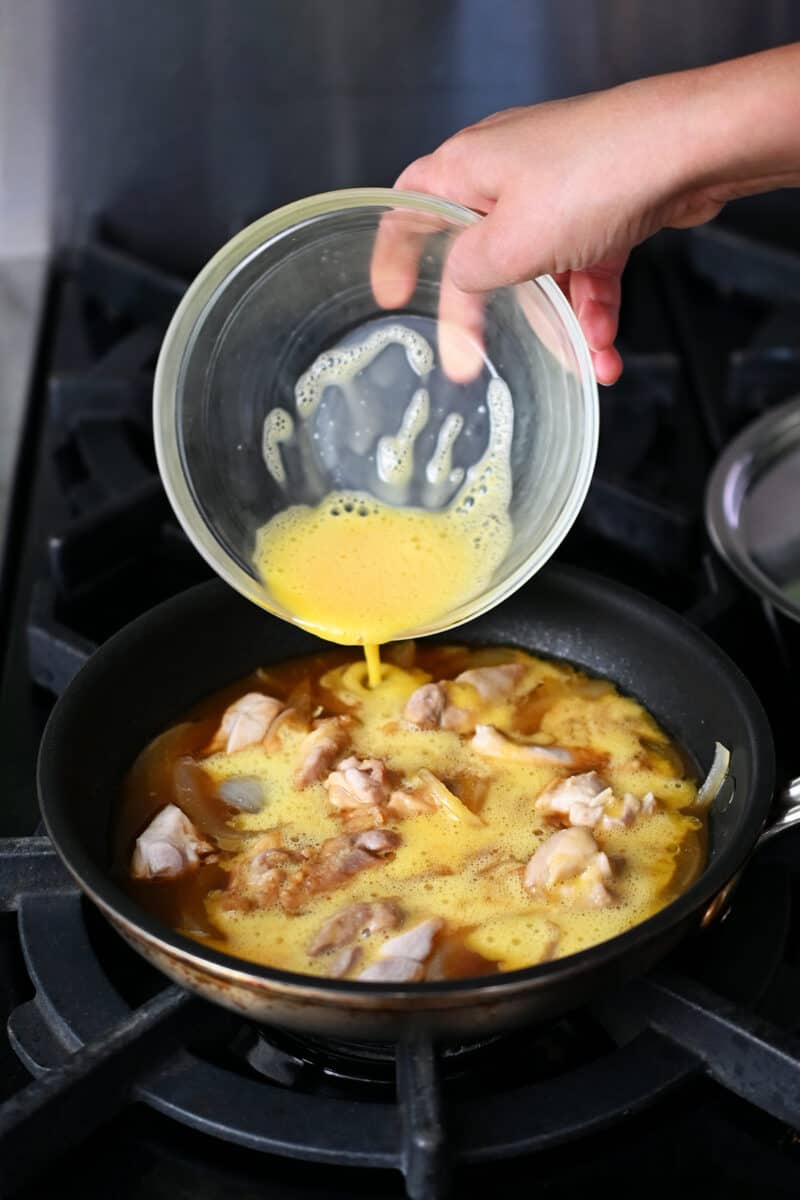
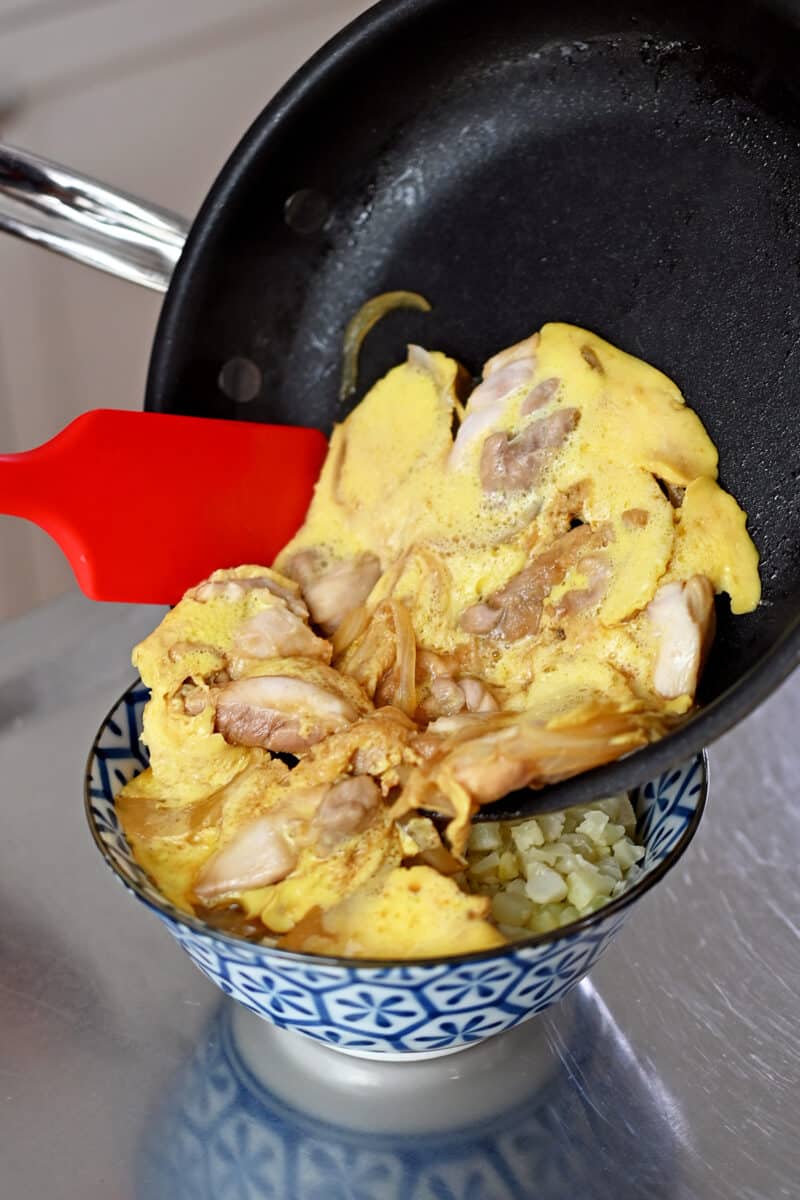
Slowly drizzle the whisked eggs over the chicken and onions.
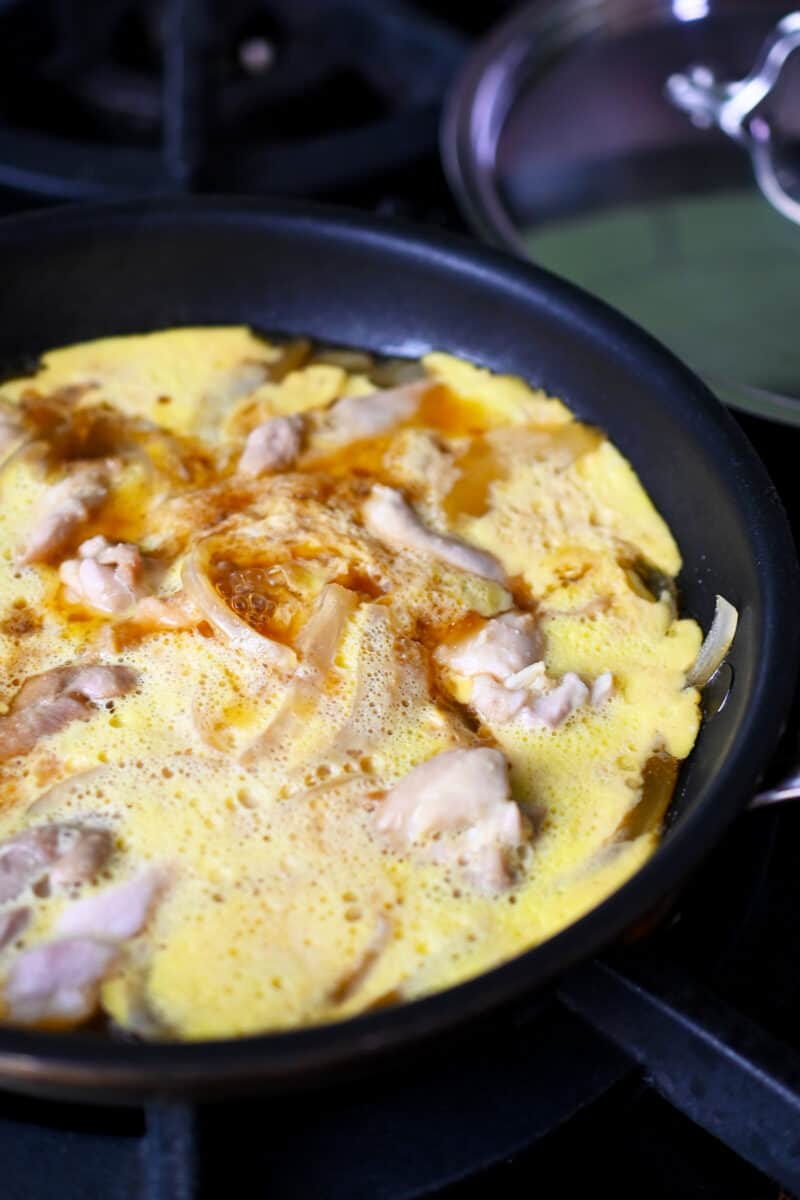
Cook, covered, on medium low heat until the egg is set to your preferred doneness. It should take about 2 minutes or so.
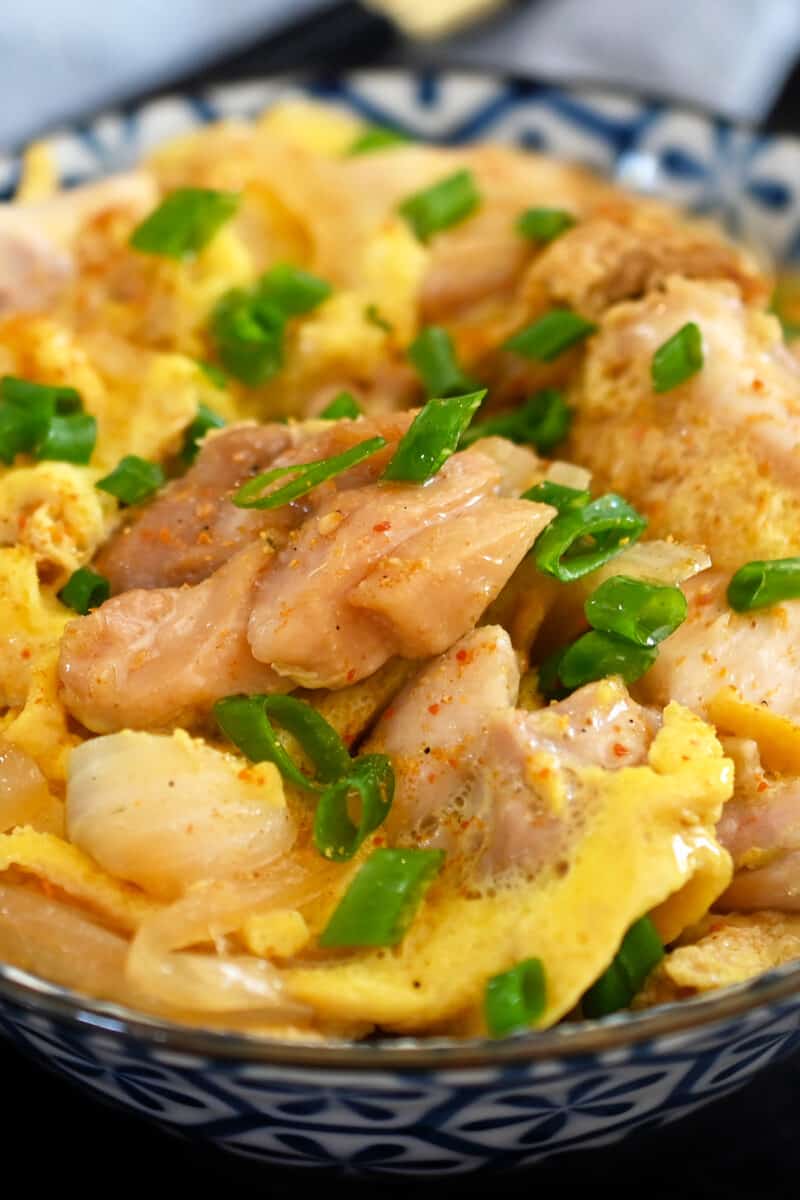
Scoop some cooked cauliflower rice (or white rice) into a bowl and carefully transfer the chicken, egg, and sauce on top.
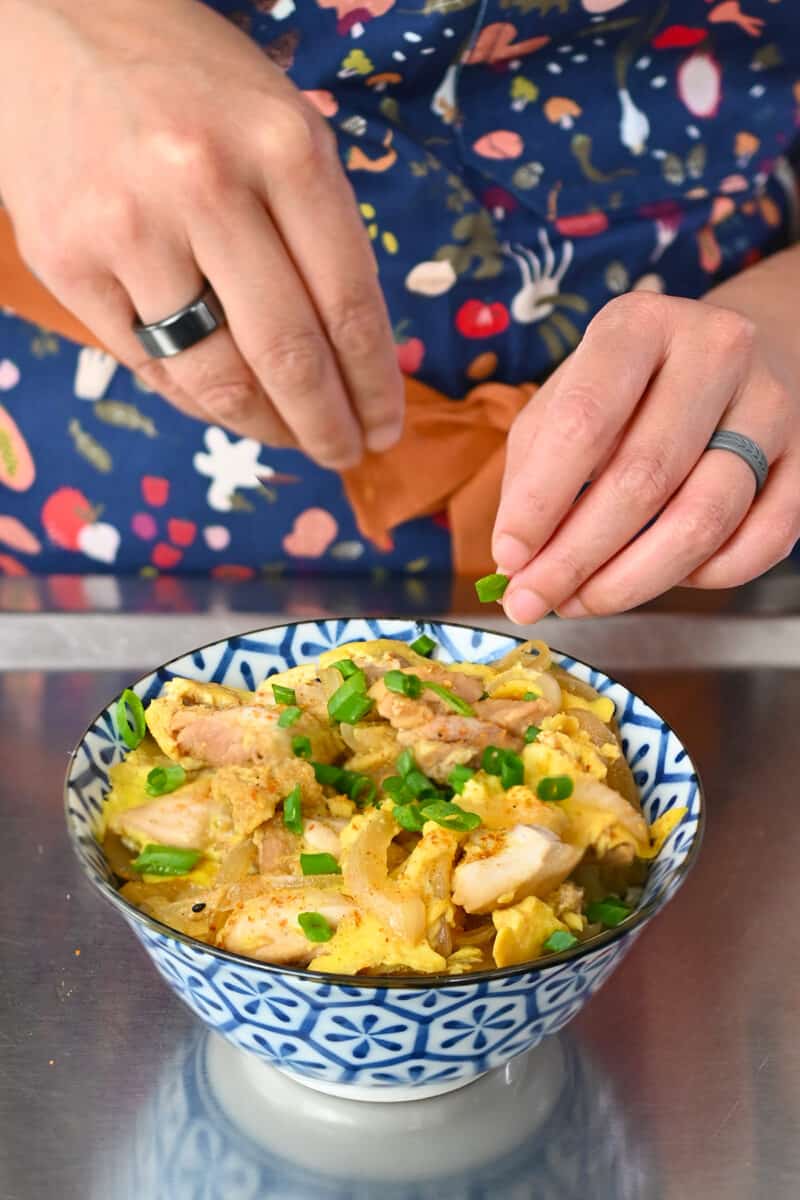
Sprinkle on some scallions for garnish and shichimi togarashi if you want it spicy!
Enjoy!
More paleo Japanese recipes
Looking for more recipe ideas? Head on over to my Recipe Index. You’ll also find exclusive recipes in my cookbooks, Nom Nom Paleo: Food for Humans (Andrews McMeel Publishing 2013), Ready or Not! (Andrews McMeel Publishing 2017), and Nom Nom Paleo: Let’s Go! (Andrews McMeel Publishing 2022).
PRINTER-FRIENDLY RECIPE CARD
Oyakodon (Japanese Chicken and Egg Bowl)

Ingredients
- ¼ small yellow onion
- 1 boneless, skinless chicken thigh
- 3 tablespoons All-Purpose Stir-Fry Sauce
- 3 tablespoons dashi or chicken broth
- 1 large egg
- 1½ cups cauliflower rice cooked
- 1 scallion thinly sliced
- shichimi togarashi optional
Instructions
- Thinly slice the onion and cut the chicken thigh into small bite sized pieces.
- In a small bowl or measuring cup, stir together the All-Purpose Stir-Fry Sauce and broth.
- Pour the sauce into an 8-inch non-stick or cast iron skillet.
- Add the sliced onion and chicken pieces to the pan and make sure the pieces are in a single layer in the sauce.
- Turn the heat to medium high and bring the sauce to a simmer. Lower the heat to maintain a simmer, about medium low, and cover the pan.
- Cook, covered, until the chicken is fully cooked and the onion is tender, about 5 minutes.
- In a small bowl, whisk the egg until nice and frothy.
- Slowly drizzle the whisked eggs over the chicken and onions. Cook, covered, on medium low heat until the egg is set to your preferred doneness. It should take about 2 minutes or so.
- Scoop some cooked cauliflower rice (or white rice) into a bowl and carefully transfer the chicken, egg, and sauce on top. Sprinkle the top with sliced scallions and shichimi togarashi, if desired.
Video
Notes
- Make one serving at a time! Traditionally, this dish is cooked in single serving portions in a special oyakodon pan. I use a small 8-inch nonstick pan or a well-seasoned cast iron skillet to cook my single serving . It’s the perfect one-person dish and I can cook the egg just the way I like it! If you need to feed more mouths and don’t want to be a short order cook, you can definitely quadruple the ingredients and cook a meal for four in a 12-inch skillet.
- Cut the onions and chicken properly! Thinly slice the onions so they’re about a quarter inch thick and the chicken pieces are small and uniform. You want the oyakodon to cook quickly and evenly!
- Don’t skimp on the sauce ingredients: The traditional sauce ingredients are already replaced with my All-Purpose Stir-Fry Sauce, so there’s no need to change anything else up! The reason this paleo oyakodon still tastes like the real thing is the sauce, people! Also, to keep things paleo, make sure you make a traditional dashi broth with just kombu and bonito flakes or use a compatible chicken broth. Instant dashi is almost always not Whole30-compatible.
Nutrition
Nutrition information is automatically calculated, so should only be used as an approximation.


Thank You So Very Much for this Really Delicious and Awesome Recipe. I am So Looking Forward to Future Terrific and Wonderful Recipes, Sincerely, Ray Spoon Of Gardena.
Holy cow, this was so easy and delicious!! I actually used up some leftover rotisserie chicken and added some egg whites for more protein. So much yum!!! I added just a dash of chili crunch at the end and this is definitely going into the rotation. Thank you for such delicious and healthy recipes!